Create a lighting environment that works with your eyes—not against them—through balanced illumination, adaptable setups, and science-informed choices tailored to your space and schedule.
For many working from home, the end of the workday brings familiar discomfort: tired eyes, mild headaches, or a lingering sense of visual fatigue that persists after the screen powers down. This experience—often called digital eye strain or asthenopia—is frequently linked to lighting environments that create visual conflict rather than support. Yet most advice narrows in on isolated fixes like “brighter bulbs” or “blue light filters,” overlooking the interconnected roles of ambient light, task illumination, screen settings, posture, biological rhythms, and work habits. This guide moves beyond product lists and quick tips. Synthesizing guidance from the Illuminating Engineering Society (IES), the American Optometric Association, and peer-reviewed research in visual ergonomics and chronobiology, we present the Harmony Lighting Framework: a layered, adaptable system to cultivate visual ease in your workspace. Whether you’re outfitting a dedicated office, optimizing a shared corner, or adapting a multi-use area, this resource offers practical, budget-aware strategies grounded in how human vision actually functions.
Introduction: Lighting as a Visual Ecosystem
Digital eye strain affects a significant portion of computer users, with symptoms ranging from dry eyes and blurred vision to neck tension and reduced focus. While screen time is often singled out, lighting conditions frequently amplify discomfort. Consider a common scenario: You position your desk facing a window to harness natural light. By mid-afternoon, direct sun creates glare on your monitor. You increase screen brightness to compensate. Meanwhile, overhead lighting casts uneven shadows across your keyboard while deepening contrast between your bright screen and dim surroundings. Your eyes continuously adjust—a subtle but cumulative strain. This isn’t user error; it’s an environmental mismatch.
Lighting science clarifies why fragmented solutions fall short. Human vision evolved to process diffuse, multi-directional daylight—not the stark contrasts of modern workspaces. When ambient light is significantly dimmer than your screen (a ratio exceeding 3:1), your visual system works harder to reconcile the disparity. Glare—whether direct (light source in view) or reflected (bouncing off screens or glossy surfaces)—triggers micro-adjustments in focus and pupil size. Poor color rendering can reduce text clarity, while imperceptible flicker from low-quality LEDs may contribute to neurological fatigue, as noted in ergonomics literature. Critically, lighting interacts with non-lighting factors: monitor height influencing neck angle, text size affecting focal demand, and reduced blink rates during concentrated screen work.
This complexity explains why generic advice like “use warm light” or “add a desk lamp” sometimes worsens strain. A warm bulb in the wrong position deepens shadows; a poorly angled lamp introduces new glare. Sustainable relief requires a systems-based approach—one that harmonizes light layers, aligns with natural biological patterns, integrates thoughtfully with technology, and adapts to your unique physiology, space, and daily rhythm. The framework ahead breaks this down into sequential, evidence-informed actions. You’ll learn not just what to adjust, but why each element matters, how to implement it precisely, and when to refine based on time of day, task type, season, or personal response. Progress, not perfection, is the goal—each thoughtful tweak builds toward lasting comfort.
The Harmony Lighting Framework: Three Interdependent Layers for Visual Ease
Visual comfort emerges not from maximum brightness, but from intentional balance. The Harmony Lighting Framework organizes workspace illumination into three interdependent layers, each serving distinct physiological and functional roles. Aligned with IES recommendations for office environments, this model replaces guesswork with clarity. Layer 1 establishes a gentle, shadow-minimizing foundation. Layer 2 delivers precise, adaptable light exactly where your hands and eyes focus. Layer 3 introduces intelligent responsiveness—reducing contrast stress, supporting natural rhythms, and easing transitions between tasks. Together, they form a resilient system adaptable to morning correspondence, afternoon design work, evening reading, or video collaboration.
The Fundamental Principle: Sustainable visual comfort arises when illumination across your entire field of view—screen, desk surface, surrounding walls, and peripheral space—is balanced to minimize unnecessary pupil adjustment and eliminate disruptive contrast gradients.
Layer 1: Ambient Light—Creating a Calm Visual Foundation
Ambient light forms the essential backdrop of visual comfort. Often overlooked as “just room lighting,” it performs the critical function of reducing luminance disparity between your screen and surroundings. When ambient light is too dim (common in dark-room setups), your screen dominates visually, forcing constant pupil adaptation. When too bright, uneven, or glaring (e.g., unfiltered windows, harsh overheads), it introduces competing focal points and reflections. The target: uniform, diffuse illumination at approximately 300–500 lux (28–46 foot-candles) across your workspace area—soft enough to avoid glare, sufficient to prevent screen dominance.
Why This Layer Matters
Your peripheral vision continuously monitors ambient conditions. Significant contrast between screen and room triggers repeated pupillary responses, contributing to visual fatigue over time. Studies in workplace ergonomics indicate that balanced ambient lighting correlates with reduced reports of eye discomfort compared to screen-only illumination. It also minimizes veiling reflections—hazy glows on screens caused by bright light sources behind the viewer. Crucially, ambient light sets the stage for Layers 2 and 3; without this balanced base, task and accent lighting cannot function optimally.
Engineering Effective Ambient Light
Natural Light Integration: Position your desk perpendicular to windows (not directly facing or with your back to them). This harnesses diffuse daylight while minimizing direct glare. Implement adjustable solutions:
– Sheer roller shades for consistent diffusion
– Light-filtering cellular shades for glare control while preserving view
– Exterior solutions (long-term): Awnings or deciduous trees can block high-angle summer sun while admitting lower-angle winter light
Use a free lux meter app (e.g., Photone for iOS, Lux Light Meter for Android) to gauge levels. Target 200–300 lux from windows alone during peak daylight. If readings consistently exceed 750 lux on your desk surface, implement shading. Seasonal note: Natural light intensity and angle shift noticeably between summer and winter—adjust shading and supplemental lighting accordingly.
Artificial Ambient Sources: Avoid bare overhead bulbs or single-point ceiling fixtures. Instead:
– Install indirect cove lighting (LED strips hidden atop wall ledges) bouncing light off ceilings for shadow-free wash
– Use multiple low-lumen wall sconces (2–3 placed asymmetrically) to create layered diffusion
– Choose flush-mount fixtures with frosted diffusers (not clear glass) rated 800–1200 lumens total for a standard 10×10 ft room
– Opt for floor lamps with upward-facing shades (e.g., torchiere style) to illuminate ceilings
Critical Specifications:
– Color Temperature: 2700K–3500K supports evening wind-down; 3500K–4000K suits daytime focus. Avoid sustained use of >4500K in ambient layers—it may feel clinical and potentially interfere with evening melatonin onset.
– CRI (Color Rendering Index): Minimum 90 CRI. Below 80, colors appear less distinct, potentially increasing visual effort to discern text or details.
– Flicker Consideration: Select lights labeled “flicker-free” or verify via slow-motion video test (minimal visible strobing).
Common Ambient Light Challenges & Thoughtful Corrections
| Challenge | Why It May Cause Discomfort | Practical Adjustment |
|———–|——————————|———————-|
| Relying solely on overhead recessed “can” lights | Creates pools of light with deep shadows; potential glare | Add two wall sconces near seated eye level (~42″) to fill shadows; replace bulbs with 2700K–3000K, 90+ CRI LEDs |
| Desk placed directly under a bright ceiling fixture | Causes direct screen glare; casts hand shadows while writing | Relocate desk if possible; install dimmer switch; add fabric shade to diffuse downward light |
| Using only window light without diffusion | Intense direct sun creates reflections; light levels shift rapidly with weather | Install light-filtering roller shade; add sheer curtains as secondary diffusion layer |
| Dark walls or surfaces absorbing light | Requires brighter (and potentially harsher) sources to achieve target illumination | Temporarily add removable light-reflective panels behind desk; consider light-toned desk accessories |
Budget-Conscious Ambient Pathways
– Under $25: Reposition an existing floor lamp with a white paper lantern shade to bounce light upward. Temporarily attach white poster board to a dark wall behind the desk to reflect ambient light.
– $25–$75: Install plug-in LED tape light ($15) along the top edge of a bookshelf behind the desk, aimed at the ceiling. Pair with a dimmable smart bulb ($20) in an existing overhead fixture.
– Rental-Friendly: Use a tension rod with sheer curtain across the window; clip-on LED panel light ($30) directed at a light-colored wall (not the desk).
Nuance: Room Size and Surface Reflectance
In compact spaces (<8×8 ft), one well-placed indirect source may suffice. Larger rooms benefit from distributed light sources to avoid dim zones. Dark surfaces (charcoal walls, walnut desk) absorb significant light—compensate with slightly higher lumen output or strategic reflectors. Light surfaces (white walls, oak desk) reflect more, allowing lower-output sources. Test by turning off all lights except ambient layer: your desk surface should be clearly visible without squinting, while your screen remains comfortably readable without maxed brightness.
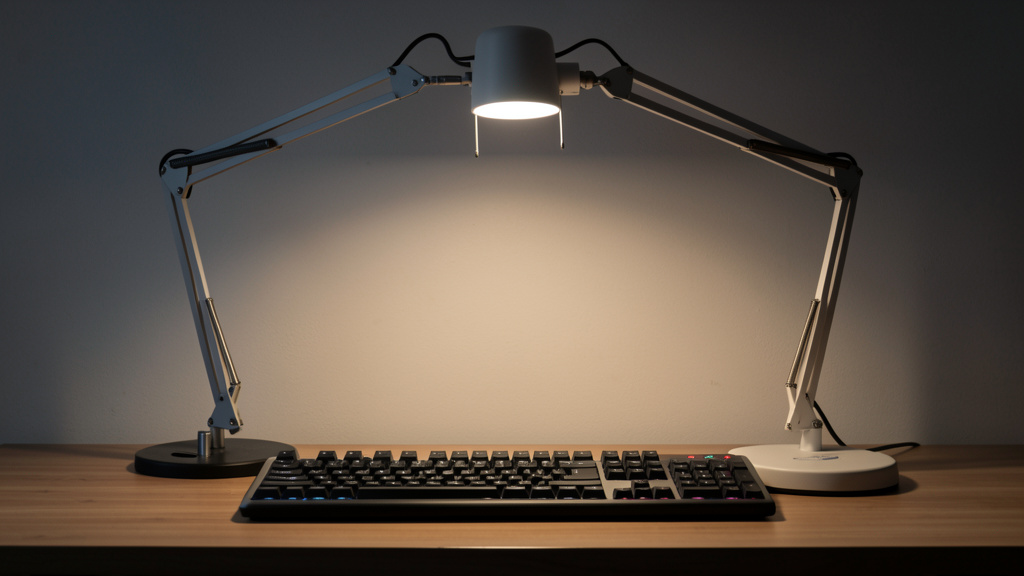
Layer 2: Precision Task Lighting—Targeted Illumination Without New Glare
Task lighting delivers focused illumination exactly where visual demand is highest: your keyboard, documents, sketchpad, or craft materials. Unlike ambient light’s broad wash, task lighting must be adjustable, shadow-minimizing, and carefully positioned to avoid screen glare. This layer addresses a frequent source of localized strain: insufficient light on physical work surfaces, which may encourage squinting or forward head posture. However, poorly implemented task lights introduce new issues—glare on screens, harsh shadows from single-direction beams, or color mismatches with ambient light causing visual confusion.
Why Precision Matters More Than Power
Your eyes shift focus constantly between screen (digital plane) and desk (physical plane). If desk illumination is notably dimmer than screen brightness, each downward glance requires subtle pupil adjustment—a repeated micro-effort. Conversely, an overly bright task light creates reflections on paper or screen coatings. The ideal task light provides approximately 500–1000 lux only on the work surface, with smooth falloff beyond its edges. Critically, it must be positionable outside the “glare zone”—typically beyond 30 degrees left or right of an imaginary line perpendicular to your screen surface.
Engineering Your Task Light Setup
Placement Guidance: Position the light source:
– To the side opposite your dominant hand (e.g., left side for right-handed users) to minimize hand shadows while writing
– Approximately 15–20 inches above desk surface
– Angled downward at 30–45 degrees toward the work area
– Outside the glare zone: Test by slowly moving a flashlight across your desk—stop where reflection vanishes from the screen.
Essential Features to Consider:
– Adjustability: Articulating arm (gooseneck or balanced-arm) for precise beam control
– Beam Quality: Diffused lens or shade (not bare LED array) to eliminate hot spots
– Dimmability: Continuous dimming (not stepped levels) to match ambient conditions
– Color Temperature Range: Tunable white (2700K–5000K) allows syncing with time of day or task
– CRI: 95+ recommended for color-critical work (design, photo editing); 90+ minimum for general use
– Flicker Mitigation: Important for close-proximity use; look for quality drivers
Task Light Types Compared
| Type | Best Suited For | Placement Tip | Consideration |
|——|—————–|—————-|—————|
| Balanced-Arm Architect Lamp (e.g., BenQ e-Reading) | Extended writing, drafting, detailed work | Mount clamp to desk edge; position shade just outside peripheral vision | Higher initial investment; requires sturdy desk surface |
| Adjustable LED Desk Lamp (e.g., TaoTronics) | General office work, adaptable setups | Place base 6″ from desk edge; angle shade toward desk center | Arm length may limit positioning range |
| Clip-On Book Light | Temporary setups, reading physical documents | Clip to non-reflective monitor top edge aimed downward at desk | Limited spread; not ideal for keyboard-focused tasks |
| Under-Cabinet LED Strip | Built-in desks, seamless integration | Install 1″ behind front desk edge; use diffuser channel | Less adjustable; best for permanent installations |
Task-Specific Tuning Guidance
– Document Reading/Writing: ~4000K color temperature, ~700 lux. Position to eliminate hand shadows. Use matte-finish paper to reduce reflections.
– Digital Art/Photo Editing: ~5000K (approximating D50 standard), 95+ CRI, ~1000 lux. Place light to evenly illuminate reference materials without screen glare.
– Evening Administrative Work: 2700K–3000K, ~400 lux. Warmer light may support evening wind-down.
– Video Calls: Soft, front-facing light near eye level (not below chin). If using a ring light, ensure it is well-diffused; alternatively, bounce a task light off a white wall in front of you.
Glare Reduction Protocol
1. Power on task light at medium brightness.
2. Sit in your normal working position.
3. Slowly rotate the lamp head while observing the screen.
4. Stop precisely where reflection disappears.
5. Fine-tune height: lower reduces spread (good for small documents); higher increases coverage (good for full keyboard).
6. If glare persists, consider a matte screen protector (reduces reflectivity) or adjust ambient layer brightness.
Budget Pathways for Task Lighting
– Immediate Fix (<$15): Repurpose a smartphone flashlight with a tissue paper diffuser taped over the lens. Angle carefully. Use only temporarily.
– Smart Budget ($25–$50): IKEA TERTIAL work lamp ($25) + replace bulb with dimmable 90 CRI LED. Add adhesive felt pads to clamp for desk protection.
– Optimal Value ($80–$150): Lamps featuring auto-dimming sensors, tunable white, and glare-reduction design (e.g., BenQ e-Reading series).
– Long-Term Investment ($150+): Balanced-arm lamps (e.g., Luxo L-3) with high-CRI LEDs and robust adjustability.
Critical Nuance: Screen Brightness Synchronization
Task lighting effectiveness depends on screen settings. After positioning your task light:
1. Set screen brightness to complement ambient light (avoid maxed settings).
2. Open a neutral document (e.g., plain white page).
3. Adjust screen brightness until the white feels integrated—not glaring, not dull.
4. Fine-tune task light dimming to harmonize.
This synchronization reduces the need for constant visual adaptation between light sources. For OLED screens (deeper blacks), slightly lower task light levels may feel more comfortable.
Layer 3: Adaptive Accent Lighting—Supporting Transitions and Biological Rhythms
Accent lighting adds intelligent responsiveness—the subtle layer that eases visual transitions and aligns your workspace with natural biological patterns. While Layers 1 and 2 address static illumination needs, Layer 3 tackles two often-overlooked strain contributors: high contrast between a bright screen and dark room periphery (“halo effect”), and circadian disruption from poorly timed color temperatures. This layer includes bias lighting (behind the monitor), shelf illumination, and smart-controlled accents that shift throughout the day.
The Role of Peripheral Light and Circadian Alignment
The retina contains specialized cells (ipRGCs) that influence circadian rhythm and pupillary response beyond basic vision. When your screen is the sole light source in a dark room, these cells receive conflicting signals: screen light suggests daytime alertness, while peripheral darkness suggests rest—a potential source of fatigue. Bias lighting (soft light behind the monitor) reduces screen-periphery contrast ratio, which research associates with reduced reports of visual discomfort. Simultaneously, gradual color temperature shifts support natural melatonin patterns: cooler light (4000K–5000K) may enhance morning alertness; warmer light (2700K–3000K) in the evening may support wind-down. Ignoring this layer means missing opportunities to align your environment with your biology.
Implementing Bias Lighting: A High-Impact Adjustment
Bias lighting is a diffuse light source placed behind your monitor, illuminating the wall directly behind the screen. It does not light your desk—it creates a soft luminous frame matching your screen’s perceived brightness.
– Why it helps: Reduces contrast stress; minimizes perceived “black crush” on screens; may allow lower screen brightness.
– Ideal setup: LED strip light mounted on the monitor backplate or wall behind the screen. Width should match or slightly exceed monitor width.
– Key considerations:
– Brightness: Adjustable to roughly 10–30% of screen brightness (use a dimmer)
– Color Temperature: Match screen’s white point (typically ~6500K for sRGB) or use tunable white synced to time of day
– Diffusion: Essential—no visible individual LEDs. Use an aluminum channel with a milky diffuser cover.
– Placement: Centered behind screen, 2–4 inches from monitor edge. Light should wash the wall evenly.
– Note for multi-monitor setups: Run a continuous strip behind all screens. For curved monitors, use flexible strip with gentle bends.
Circadian Lighting Integration
Program ambient and bias lights to shift color temperature gradually:
– Morning (e.g., 6:00 AM – 12:00 PM): 4000K–5000K (supports natural alertness)
– Afternoon (e.g., 12:00 PM – 6:00 PM): 3500K–4000K (balanced focus)
– Evening (e.g., 6:00 PM onward): 2700K–3000K (supports wind-down)
Use smart plugs (TP-Link Kasa) or tunable-white bulbs (Philips Hue White Ambiance) with scheduling apps. Important: Sync screen settings too—enable Night Shift (macOS), Night Light (Windows), or f.lux with matching schedules. True alignment requires harmony across all light sources. Avoid abrupt transitions; gradual shifts feel more natural.
Supporting Transitions: Shelf and Pathway Lighting
Reduce strain during task shifts with subtle accents:
– Document shelf lighting: Low-level LED strips under shelves holding reference materials. Activates only when reaching for books—prevents squinting. Motion-sensor strips offer convenience.
– Floor pathway light: Small plug-in night light (2700K, <50 lumens) near the desk for brief breaks. Helps preserve partial dark adaptation.
– Monitor riser backlight: For laptops on risers, a tiny LED strip behind the device may reduce neck strain when glancing down.
Layer 3 Implementation Scenarios
| Scenario | Solution Approach | Rationale |
|———-|——————-|———–|
| Evening writer concerned about sleep | Bias light + ambient set to 2700K at sunset; screen night mode enabled | Reduces blue-rich light exposure; minimizes screen-periphery contrast strain |
| Graphic designer with multi-monitor setup | Continuous bias strip behind all screens; tunable task light at 5000K | Promotes color consistency; reduces eye travel fatigue across wide field |
| Small apartment with desk in living area | Smart bulb in nearby floor lamp scheduled to warm at dusk; bias light active only during work | Contains work lighting; avoids disrupting household ambiance |
| Frequent video caller | Small, diffused front-facing light near camera; bias light behind screen | Reduces shadows on face; minimizes screen glare during calls |
Budget Pathways for Layer 3
– Entry Point ($10–$15): Govee LED strip sample kit + free app scheduling. Mount behind monitor with adhesive. Set to warm white at low brightness.
– Integrated ($35–$70): Budget-friendly tunable strips with remote dimming; plug-in bias light panels that clamp to monitor tops (e.g., BenQ ScreenBar Halo) require no wall mounting.
– Rental-Safe: Monitor-clamp lights or plug-in strips with removable adhesive.
Important Considerations for Layer 3
– Bias light brightness: Should never exceed screen brightness. Test: bias light should be noticeable only when the screen is off.
– Color consistency: Avoid RGB color-changing strips for bias lighting—stick to tunable white for visual stability.
– Scheduling over reactivity: Prefer time-based or manual scheduling over content-synced color shifts (e.g., reacting to screen colors), which may cause visual distraction.
Beyond the Bulb: An Integrated Approach to Visual Well-Being
Lighting is one vital component of visual comfort. Even a thoughtfully engineered lighting setup benefits from alignment with screen ergonomics, digital habits, and environmental factors. This section integrates complementary, evidence-informed strategies into a cohesive support system—each element reinforcing the others. Think of lighting as the foundation, with these components providing essential structural support.
Screen Settings: Calibrating Your Digital Canvas
Lighting adjustments are complemented by thoughtful screen configuration. Implement this sequence after optimizing ambient conditions:
1. Brightness Calibration: In typical room light, display a neutral webpage. Adjust screen brightness until whites appear integrated—not glowing, not gray. Often 40–60% suffices with balanced ambient light.
2. Text Scaling: Increase system text size (Settings > Accessibility) to 110–125%. Larger text reduces sustained close-focus demand.
3. Color Temperature Scheduling: Enable OS-level night mode with gradual transition (e.g., f.lux “Slow Transition”). Abrupt shifts can feel jarring.
4. Matte Screen Protector: Apply an anti-glare film (e.g., 3M Privacy Filter Matte). Reduces reflectivity significantly—especially helpful if window glare persists.
5. Refresh Rate: If your monitor supports 120Hz+, enable it. Higher refresh rates may reduce perceived flicker during motion.
The 20-20-20 Practice: Supporting Natural Visual Rhythms
Every 20 minutes, glance at something approximately 20 feet away for about 20 seconds. This practice aligns with ocular physiology: sustained near-focus can contribute to ciliary muscle fatigue, while distant viewing encourages relaxation. Implementation matters:
– Gentle reminders: Use apps like Time Out (Mac) or EyeLeo (Windows) with subtle fade alerts.
– Habit anchoring: Link to natural breaks—after sending an email, finishing a paragraph, or a calendar notification.
– Enhance the pause: During the 20 seconds, consciously complete 3–5 full blinks (dry eyes compound strain). If possible, look toward a window—natural elements may support mental reset.
– Team adaptation: In collaborative settings, normalize brief focus breaks via shared understanding.
Ergonomic Synergy: Where Light Meets Posture
Lighting and posture interact closely. Monitor height influences how light reaches your eyes:
– Monitor Position: Top of screen at or slightly below eye level. Helps maintain a neutral neck position and reduces exposure to overhead glare. Monitor arms enable precise adjustment.
– Document Holder: Place physical documents on a slanted holder beside the monitor at screen height. Minimizes constant refocusing between desk surface (potentially dim) and screen (bright).
– Seating: Feet flat, elbows near 90 degrees. Supports posture that keeps eyes consistently positioned relative to light sources.
– Work Surfaces: Matte-finish desks (laminate, wood) reduce localized reflections compared to glossy surfaces (glass, high-gloss paint). Position task light to avoid casting hand shadows on key areas.
Environmental Factors: Humidity, Airflow, and Surfaces
- Humidity: Very dry air (<40% relative humidity) may accelerate tear evaporation. A small desktop humidifier or water container near a heat source can help. Target 40–60% RH if possible.
- Airflow: Avoid positioning your desk directly in HVAC airflow. Moving air can dry eyes rapidly. Redirect vents or use a desk fan on the lowest setting pointed away from your face.
- Surface Choices: As noted, matte surfaces minimize secondary glare points. Light-colored walls reflect ambient light more effectively than dark ones.
Digital Environment: Reducing Cognitive Load
Visual strain isn’t purely optical—it’s cognitive. Cluttered screens increase processing demand:
– Dark Mode Consideration: Use dark mode primarily in low-ambient-light conditions. In well-lit rooms, light mode often provides better text contrast. Avoid pure black (#000) on pure white (#FFF); opt for soft off-whites (e.g., #F8F9FA) and dark grays (#333).
– Desktop Declutter: Remove unused icons. Use solid-color, low-contrast wallpapers (soft gray). Visual noise increases scanning effort.
– Browser Tools: Extensions like Just Read (simplifies articles) or customizable dark mode tools can reduce visual complexity.
– Notification Management: Disable non-essential visual alerts. Each interruption resets visual focus and adaptation.
Navigating Real-World Constraints: Practical Pathways for Diverse Situations
Theory meets practice in imperfect spaces. This section offers actionable, tested approaches for common challenges—prioritizing meaningful progress over theoretical perfection. Lighting professionals often emphasize: Progressive optimization builds lasting comfort. Implement one high-leverage adjustment today; refine tomorrow.
Scenario: Limited or No Natural Light (Windowless Room/Basement)
Challenge: Reliance on artificial light risks circadian disruption and visual monotony.
Adaptive Pathway:
1. Simulate daylight progression: Use tunable-white overhead lighting scheduled to shift from cooler (morning) to warmer (evening) tones.
2. Maximize diffusion: Combine indirect sources—LED strips in ceiling cove + upward-facing floor lamp. Avoid single-point fixtures.
3. Add visual depth: Place a large nature photograph on the wall opposite the desk. Illuminate softly with a picture light (3000K) to create perceived depth.
4. Prioritize bias lighting: Especially critical in fully artificial environments to reduce screen-periphery contrast.
Budget Path: Smart bulb in existing fixture + bias light strip + temporary light-reflective panels on dark walls.
Scenario: Compact Space / Desk in Shared Living Area
Challenge: Lighting must serve dual purposes without disrupting household ambiance or appearing cluttered.
Adaptive Pathway:
1. Contain the workspace: Use a desk with integrated, directional lighting (e.g., under-shelf LEDs) that activates only during work hours.
2. Precision over spread: Choose a task light with a focused beam (e.g., Anglepoise Type 75 Mini) illuminating only the desk surface.
3. Smart scheduling: Program workspace lights to auto-off at day’s end. Use a voice command or switch ritual for closure.
4. Visual separation: A room divider (folding screen, bookshelf) behind the desk can house bias lighting and define the zone.
Budget Path: Clip-on monitor light (ScreenBar) minimizes footprint; smart plug on existing lamp with scheduling.
Scenario: Tight Budget Constraints (<$50 Total)
Challenge: Limited funds shouldn’t mean enduring discomfort. Prioritize highest-impact, lowest-cost actions.
Progressive Sequence:
1. Free optimizations: Reposition desk perpendicular to window; use white paper on dark desk as a temporary reflector; enable all OS screen comfort settings.
2. $10: Matte screen protector (often reduces glare more effectively than adding lights).
3. $15: Dimmable LED desk lamp (IKEA TERTIAL) + replace bulb with 90 CRI LED.
4. $20: Basic bias light strip kit mounted behind monitor.
5. $5: Printable 20-20-20 reminder card taped to monitor bezel.
Key Insight: Addressing screen glare and adding bias lighting often delivers substantial relief for under $35. Perfect ambient lighting can follow later.
Scenario: Rental Restrictions (No Drilling/Mounting)
Challenge: Landlord prohibits permanent modifications.
Adaptable Toolkit:
– Bias lighting: Monitor-clamp lights (BenQ ScreenBar Halo) require zero mounting.
– Ambient light: Plug-in wall sconces with removable adhesive hooks (Command Strips); upward-facing floor lamp.
– Task light: Balanced-arm lamp with heavy base (no clamp needed).
– Window treatment: Tension rod with sheer curtain; removable static-cling window film for glare control.
– Surface reflectivity: Removable peel-and-stick light-reflective wallpaper on wall behind desk (designed for clean removal).
Pro Tip: Photograph pre-existing conditions; retain original fixtures/bulbs for reinstallation before moving out.
Scenario: Shared Space with Differing Lighting Preferences
Challenge: Partner prefers dim lighting; your work requires adequate illumination.
Collaborative Strategy:
1. Zone lighting: Use a directional task light focused only on your desk area (e.g., gooseneck lamp with narrow beam angle).
2. Personal bias light: Monitor-clamp light affects only your visual field.
3. Compromise ambient: Set shared overhead light to the lowest mutually comfortable level; supplement only your zone with task lighting.
4. Shared understanding: Discuss the science—balanced lighting can reduce strain for everyone long-term. Propose a short trial period.
Guiding Principle: Your lighting should illuminate your workspace without flooding shared areas. Precision > power.
Scenario: Existing Fixture Limitations (Recessed Cans, Older Fluorescents)
Challenge: Stuck with harsh overheads or flickering office-style fluorescents.
Immediate Mitigation:
– Recessed cans: Install retrofit LED baffles ($8 each) with frosted lenses to diffuse light. Add a dimmer switch if wiring permits.
– Fluorescents: Replace tubes with “flicker-minimized” LED tubes (verify ballast compatibility). Add an acrylic diffuser panel below the fixture.
– Universal approach: Never rely solely on overheads. Layer task + bias lighting to override poor ambient quality. Position desk away from direct fixture alignment.
Longer-Term: If applicable, reference IES guidelines when discussing fixture upgrades with property managers or employers. Document observations if strain symptoms persist.
Your Questions, Answered
Q: Can blue light glasses replace proper lighting adjustments?
A: Current guidance from the American Academy of Ophthalmology indicates that blue light from digital screens does not cause eye disease, and environmental adjustments are generally more impactful for reducing digital eye strain than blue-blocking lenses. Glasses may offer subjective comfort for some individuals, but they do not address glare, contrast imbalance, or inadequate illumination on physical work surfaces. Prioritize optimizing your lighting environment, screen settings, and work habits first; consider glasses only as a potential supplementary measure if discomfort persists after these adjustments.
Q: What’s the ideal color temperature for all-day computer work?
A: There is no single ideal temperature—it benefits from alignment with natural light patterns. For daytime focus (e.g., 9 AM–5 PM), 3500K–4000K often provides alertness without harshness. Avoid sustained use of very cool light (>4500K) for extended periods, as it may increase visual scatter for some. Crucially, match color temperatures across layers where possible: if ambient light is 3000K, a 5000K task light may create visual conflict. Tunable-white fixtures scheduled to gradually warm after sunset support natural transitions. Personal comfort varies—observe your own response.
Q: My eyes feel dry even with good lighting. What else might help?
A: Dryness is often linked to reduced blink rate and environmental factors during screen focus. Combine lighting adjustments with: consciously completing full blinks every 10–15 minutes; using preservative-free artificial tears if recommended by an eye care professional; maintaining room humidity around 40–60%; and ensuring HVAC airflow isn’t directed at your face. Positioning the monitor slightly below eye level may also reduce exposed eye surface area, slowing tear evaporation. If dryness persists, consult an optometrist to rule out underlying conditions.
Q: Are expensive “ergonomic” lamps worth the investment?
A: Value depends on specific features, not price alone. Prioritize evidence-informed attributes: flicker-minimized operation (verify via slow-motion video test), 90+ CRI, smooth continuous dimming, and robust adjustability (arm reach >18″). A well-chosen $40 lamp with these traits may outperform a $200 lamp lacking them. For bias lighting, even budget LED strips work effectively if properly diffused and dimmed. Invest first in bias lighting and screen calibration—they often deliver significant strain reduction per dollar spent. Consider your specific tasks and longevity needs.
Q: How can I estimate light levels without a professional lux meter?
A: Free smartphone apps like Photone (iOS) or Lux Light Meter Pro (Android) provide reasonable estimates for relative comparisons. While less precise than calibrated meters, they help gauge ratios (e.g., screen vs. desk brightness). For ambient light: point the phone sensor toward the ceiling while seated. Target roughly 300–500 lux. For task light: measure the desk surface where hands work. Target approximately 500–1000 lux. A critical check: measure screen brightness and ambient light on the wall behind the screen—the ratio should feel balanced (ideally under 3:1). Apps also help screen for noticeable flicker (look for stable readings).
Q: Does monitor size or resolution change lighting needs?
A: Indirectly, yes. Larger or higher-resolution screens often default to higher brightness, increasing contrast with surroundings. Always calibrate screen brightness after setting up ambient light. Higher pixel density (Retina, 4K) can improve text clarity—reducing accommodative demand—but only if text scaling is appropriate. Crucially: larger screens occupy more of your peripheral field. Bias lighting becomes more valuable with ultrawide or multi-monitor setups to maintain consistent peripheral luminance and reduce contrast strain.
Q: I work night shifts. How should I approach lighting?
A: Intentionally reverse the circadian protocol to support your schedule. During your active “day” (evening/night): use 4000K–5000K ambient and task lighting to support alertness. During your wind-down period (pre-sleep morning): shift all lights to 2700K or warmer, use blackout curtains in sleeping areas, and enable aggressive screen night mode. If commuting home at dawn, blue-light-filtering glasses may help minimize morning light exposure. Consistency is key—maintain this reversed schedule even on days off to support circadian stability. For personalized guidance, consult a sleep specialist familiar with shift work.
Q: Can desk plants help reduce eye strain?
A: Not directly through lighting mechanics—but indirectly, yes. Research in environmental psychology suggests that brief views of nature (even small plants) during microbreaks may support mental restoration and reduce stress. Place a low-maintenance plant (snake plant, ZZ plant) within your 20-foot focal range for the 20-20-20 practice. Avoid plants requiring direct sun that could introduce glare. The psychological benefit of biophilic elements complements physiological lighting adjustments as part of a holistic workspace.
Q: How can I detect problematic flicker from LED lights?
A: Flicker can contribute to visual fatigue, even when imperceptible. Simple test:
1. Point your smartphone camera (in video mode) at the light source.
2. Look for rolling dark bars, strobing, or instability.
3. If visible, the light may have problematic flicker.
Choose lights labeled “flicker-free” or compliant with IEEE PAR1789 guidelines. Quality drivers (often in higher-tier lamps) minimize ripple current. For existing multi-bulb fixtures, adding an incandescent/halogen bulb can sometimes dampen flicker perception (due to thermal inertia), though less energy-efficient. Prioritize flicker-minimized task and bias lights where proximity magnifies impact.
Q: Is candlelight or firelight simulation helpful for evening work?
A: With important caveats. Very warm light (<2200K) like candlelight minimizes blue-rich exposure—but output is typically too dim for sustained task work, potentially forcing increased screen brightness that negates benefits. A more balanced solution: use a dimmable 2700K task light at the lowest comfortable setting plus matching bias lighting. Reserve candle-simulation effects (via smart bulbs) for ambient-only relaxation after work concludes. Never rely on candlelight alone for desk tasks—it creates high-contrast shadows that may increase visual effort.
Conclusion and Your Next Step
You now have a comprehensive, adaptable system for cultivating a home office lighting environment that supports your vision, focus, and well-being. The Harmony Lighting Framework—Ambient Foundation, Precision Task Layer, and Adaptive Accent Intelligence—offers a scalable path whether you implement one adjustment or redesign comprehensively. Remember: the goal is progressive improvement, not overnight perfection. Each thoughtful change compounds. Adding bias lighting may allow lower screen brightness. Repositioning a lamp may eliminate keyboard shadows. Taking a 20-second gaze out the window resets visual focus. These micro-adjustments collectively transform your workspace from a source of strain into a foundation for sustainable productivity.
Three Guiding Principles to Carry Forward
1. Balance contrast: Ensure illumination across your entire field of view minimizes stark disparities between screen, desk, and surroundings. Bias lighting is often the most accessible starting point.
2. Precision over intensity: Task lighting should eliminate shadows without creating new glare—adjustability and diffusion matter more than raw brightness.
3. Honor natural rhythms: Gradually shift color temperatures with the time of day; protect evening darkness to support rest and next-day resilience.
Your 24-Hour Action: One Simple, Meaningful Step
Within the next day, complete this single action:
Position a soft light source (an existing lamp, a phone flashlight with tissue diffuser) behind your monitor to create a gentle glow on the wall. Adjust brightness until it’s subtly visible when the screen is on—never brighter than the screen itself. Use it during your next work session.
This takes under two minutes. Yet this small adjustment directly addresses contrast-related visual stress documented in ergonomics research. Notice any difference in screen comfort. This tiny win builds momentum. Tomorrow, add a 20-20-20 reminder. Next week, refine task light placement. Progress compounds through consistent, manageable steps.
A Broader Perspective: Lighting as Daily Self-Care
Your workspace lighting reflects a daily choice about how you support your well-being. In a world of sustained screen engagement, engineering visual comfort is an act of sustainable productivity—a recognition that your eyes are irreplaceable instruments deserving of thoughtful care. This framework extends beyond the home office: apply these principles to children’s study areas, crafting stations, or reading nooks. Share the bias lighting concept with a colleague experiencing discomfort. Advocate for balanced lighting in shared spaces using accessible science. When we normalize environments that protect vision, we elevate collective well-being. Begin with your desk. The light you cultivate today supports not only your screen, but your path to healthier, more focused work for years to come.
Explore Our Complete System:
The Ergonomic Desk Setup Blueprint: From Chair to Monitor Height | Mastering Digital Minimalism: Declutter Your Screen, Reclaim Focus | The Circadian Workspace: Aligning Light, Temperature, and Sound for Natural Energy | Sustainable Home Office Materials: Non-Toxic, Low-VOC, and Biophilic Choices | The 5-Minute Daily Reset: Micro-Habits to Prevent Burnout and Restore Clarity | Visual Ergonomics for Hybrid Work: Seamless Transitions Between Office and Home | The Mindful Workspace: Integrating Calm, Focus, and Intention into Your Daily Environment