Transform Your Backyard into a Thriving, High-Yield Oasis with Science-Informed Strategies and Season-Long Succession Plans
Imagine stepping into your garden each dawn to harvest sun-warmed tomatoes still dusted with dew, crisp lettuce for your morning salad, and carrots so vibrant they taste like childhood memories. This isn’t a fantasy reserved for rural homesteads or seasoned horticulturists—it’s an achievable reality for any space, from a sunny balcony to a suburban quarter-acre. This guide dismantles the overwhelm of vegetable gardening by providing a clear, actionable framework that transforms uncertainty into confidence, season after season. Drawing on aggregated insights from agricultural extension services and peer-reviewed research on home gardening systems, we present a unified approach where soil science, ecological principles, and practical logistics converge into one seamless journey. Results will vary based on local conditions, effort, and environmental factors—this framework offers adaptable pathways, not guaranteed outcomes.
Introduction: Why Gardens Sometimes Underperform (And How Thoughtful Design Helps)
Walk through any neighborhood in late summer, and you may notice patterns: raised beds needing attention, tomato plants with sparse fruit, zucchini vines sprawling beyond intended boundaries. These aren’t reflections of gardener effort—they often stem from fragmented approaches. Gardeners may focus energy on planting seeds while overlooking foundational elements beneath the soil. Generic planting dates might ignore microclimates. Pest responses may be reactive rather than preventive. The result can be frustration, wasted resources, and hesitation to continue.
This guide offers a different path. Productivity in vegetable gardening emerges from working with natural systems, not against them. A resilient garden functions like an interconnected ecosystem—soil biology, water cycles, plant relationships, and seasonal rhythms supporting one another. Research, including work associated with institutions like the Rodale Institute, suggests that gardens applying integrated ecological practices may achieve notably higher yields per square foot over time while often requiring fewer external inputs. This isn’t magic; it’s methodology. Shifting focus from isolated tasks (“plant seeds,” “pull weeds”) to interconnected systems (“nurture soil life,” “design habitat”) builds resilience alongside harvests. Whether you’re planting your first seedling in a container or refining an established plot, this framework meets you where you are. Let’s begin where every enduring garden truly starts: not with seeds, but with soil.
The Four-Season Cycle Framework: Gardening as a Living System
Move beyond the linear “plant-grow-harvest” model. Nature operates in cycles: seasons transition, decay nourishes new growth, and today’s choices shape tomorrow’s conditions. The Four-Season Cycle Framework treats your garden as a dynamic, evolving system with four interdependent phases. Working with this rhythm supports continuous harvests while gradually enhancing soil fertility and ecosystem health year after year. This is gardening as stewardship.
The Guiding Principle: True productivity reflects the cumulative health of your soil, the diversity of your garden ecosystem, and the consistency of harvests across seasons—not just a single abundant yield.
Phase 1: The Foundation Phase (Late Winter to Early Spring) – Soil & Site Intelligence
Before seeds meet soil, your most influential work happens beneath the surface. Soil is a living matrix teeming with microorganisms, fungi, earthworms, and organic matter. These elements decompose nutrients, improve structure, suppress diseases, and create conditions where roots thrive. Investing thoughtfully here reduces challenges later. Neglecting this phase often leads to greater effort downstream.
Why Soil Assessment Is a Critical First Step (And How to Approach It)
Many gardeners assume “more compost = better soil,” but soil health is nuanced. pH influences nutrient availability: acidic soils (below pH 6.0) may limit phosphorus uptake; alkaline soils (above pH 7.5) can restrict iron and zinc, sometimes showing as yellowing leaves in sensitive crops like blueberries. Soil texture also matters—sandy soils drain quickly but may leach nutrients; heavy clays retain moisture but can limit root oxygen.
A Practical Soil Assessment Approach:
1. Timing: Assess soil 4–6 weeks before planting. Avoid testing within 30 days of amendments or after heavy rain.
2. Sampling: Use a clean trowel. Collect 10–15 samples from different garden areas (including spots where plants struggled previously), digging 6–8 inches deep. Mix thoroughly in a clean bucket. Remove debris.
3. Assessment Options:
* DIY Kit (Budget-Friendly): $15–$30 kits measure pH and major nutrients (N-P-K). Follow instructions carefully—color interpretation can be subjective. Best for quick pH checks.
* Mail-In Lab (Recommended): $25–$60 through your local Cooperative Extension Service (find via USDA website). Provides detailed pH, organic matter percentage, nutrient levels, lead screening (important for urban gardens), and tailored amendment suggestions. Many consider this a high-value step for new gardeners.
4. Interpreting Results: Focus on context. If “Phosphorus: High,” adding more phosphorus-rich amendments is unnecessary and may impact local waterways. If “Organic Matter: 2%,” incorporating compost can gradually improve moisture retention and microbial activity. Target ranges vary by crop and region—your extension report offers localized guidance.
Example: A gardener in the Pacific Northwest assessed clay-heavy soil showing pH 5.8 and organic matter at 3%. Following extension recommendations, they incorporated composted pine bark to improve structure and applied pelletized lime to adjust pH. Over subsequent seasons, soil structure improved, supporting straighter carrot roots and increased earthworm activity.
Nurturing Living Soil: Beyond “Just Add Compost”
Compost is valuable—but soil vitality benefits from layered, context-aware inputs.
| Amendment Type | Primary Function | Best For | Application Guidance (Per 100 sq ft) | Timing Consideration |
|---|---|---|---|---|
| Finished Compost | Adds organic matter, microbes, slow-release nutrients | Most garden soils; depleted or sandy areas | 1–3 inches worked into top 6–8″ | Early spring or fall |
| Well-Rotted Manure (cow, horse) | Boosts nitrogen, improves water retention | Heavy feeders (corn, squash); clay soils | ≤1 inch; must be aged 6+ months | Fall application preferred |
| Cover Crops (clover, rye, vetch) | Fixes nitrogen (legumes), prevents erosion, suppresses weeds | Off-season soil protection; new beds | Broadcast densely; incorporate 3 weeks before flowering | Fall planting for spring benefit |
| Biochar | Creates pore spaces for microbes/water; long-term carbon storage | Sandy soils; fertility building | ½ cup per sq ft, mixed thoroughly | Activate first by blending with compost |
| Kelp Meal | Supplies trace minerals, supports root development | All soils; transplants; stressed plants | 1–2 lbs | At planting time |
| Gypsum | Improves structure in compacted clay without altering pH | Heavy clay with drainage concerns | 20–40 lbs | Early spring |
Important Consideration: Avoid applying fresh manure near vegetable planting times. Fresh manure may contain pathogens and high ammonia levels that can harm plants. Guidelines like those from the USDA National Organic Program suggest waiting periods between manure application and harvest (e.g., 120 days for root crops). When uncertain, use fully composted amendments or plant cover crops.
The No-Dig Option: Traditional tilling aerates soil but can disrupt beneficial fungal networks (mycorrhizae). For established beds, “no-dig” gardening offers an alternative: layer cardboard (to suppress weeds) topped with 4–6 inches of compost. Plant directly into the compost. Each season, add another inch of compost. Research, including studies from the University of Minnesota, has observed significant increases in earthworm activity and reduced weeding needs in no-dig systems over multiple years.
Site Assessment: Observing Your Garden’s Unique Conditions
Sunlight, slope, wind, and water access shape what thrives where. Spend time observing your space before finalizing plans.
- Sun Mapping: Track sunlight hourly from 8 AM to 6 PM over a clear day. Most fruiting vegetables (tomatoes, peppers, cucumbers) generally require 6–8+ hours of direct sun. Leafy greens (lettuce, spinach, kale) often tolerate 4–6 hours. Root crops (carrots, beets) typically need 6+ hours. Sketch zones: “full sun,” “partial shade,” “deep shade.”
- Water Flow Observation: After rain, note where water pools (poor drainage) or rushes (erosion risk). Avoid low spots where cold air settles (“frost pockets”). South-facing slopes warm earlier in spring; north-facing areas stay cooler—useful for heat-sensitive crops.
- Wind Patterns: Note prevailing wind direction. Strong winds can damage seedlings. Plan windbreaks: temporary fencing, sunflower rows, or positioning near existing structures.
- Practical Placement: Locate gardens within easy reach of your home (under 50 feet ideal) and water source. Avoid areas beneath black walnut trees (juglone toxin can inhibit growth of tomatoes, potatoes, peppers).
Example to Avoid: A gardener planted tomatoes in a spot receiving only 5 hours of direct light due to afternoon shade. Plants became leggy with limited fruit and were prone to moisture-related issues. Relocating to a sunnier location the following year supported healthier growth.
Phase 2: The Blueprint Phase (Early to Mid-Spring) – Design & Strategic Crop Selection
A garden without intentional design often leads to overcrowding, mismatched harvest times, or underused space. The Blueprint Phase transforms intention into layout. This is where you design for continuous harvests, not just a single-season yield.
The 3-Zone Productivity Layout
Organize your garden by function and access frequency—not just appearance.
-
Zone 1: The Daily Harvest Zone (Closest to Kitchen)
- Purpose: Crops harvested multiple times weekly. Minimizes steps for fresh ingredients.
- Crops: Leafy greens (lettuce, arugula, spinach), herbs (basil, parsley, cilantro), radishes, scallions, bush beans.
- Design Tip: Use narrow beds (max 4 ft wide) for easy reach. Consider a small rain barrel nearby for quick watering.
-
Zone 2: The Core Production Zone (Middle Area)
- Purpose: Main-season crops needing support or space.
- Crops: Tomatoes, peppers, eggplants, cucumbers, squash, pole beans, corn.
- Design Tip: Orient rows north-south for balanced sun exposure. Place taller crops (corn, sunflowers) on the north side to avoid shading shorter plants. Install trellises before planting.
-
Zone 3: The Succession & Storage Zone (Farthest Area)
- Purpose: Crops planted in sequence or for storage. Less frequent access needed.
- Crops: Root vegetables (carrots, beets, potatoes), onions, garlic, winter squash, dry beans, cover crops for fall.
- Design Tip: Group crops with similar harvest windows. Dedicate space for fall/winter crops (kale, Brussels sprouts, leeks).
Crop Selection: Aligning Choices With Your Context
Beginners sometimes select challenging crops while overlooking reliable staples. Use this decision guide:
| Your Priority | Recommended Crops | Crops to Approach Cautiously Initially | Why |
|---|---|---|---|
| Maximize Yield per Sq Ft | Swiss chard, pole beans, zucchini, cherry tomatoes, radishes | Corn, pumpkins, watermelon | Vertical growers or “cut-and-come-again” crops produce continuously in compact spaces |
| Beginner-Friendly Reliability | Lettuce, bush beans, carrots, radishes, zucchini | Cauliflower, celery, head lettuce | Forgiving of minor variations; quicker harvests build confidence |
| Pest Resilience | Basil, marigolds, nasturtiums, onions, garlic | Brassicas (broccoli, kale) without protection | Strong scents may deter pests; alliums have natural repellent properties |
| Continuous Harvest | Leaf lettuce, spinach, arugula, bush beans, cucumbers | Head lettuce, broccoli (single harvest) | “Cut-and-come-again” varieties regrow after harvesting outer leaves |
| Fall/Winter Harvest | Kale, Swiss chard, carrots, beets, spinach, leeks | Tomatoes, peppers, cucumbers | Cold-tolerant crops often sweeten after light frost; extend season with protection |
Key Insight: Review “days to maturity” on seed packets. In shorter-season climates (USDA Zones 3–5), select varieties maturing in 60 days or less for reliable harvests before frost. In warmer zones (Zones 8–10), choose heat-tolerant varieties (e.g., ‘Heatmaster’ tomatoes) that set fruit in higher temperatures. Your local Cooperative Extension’s recommended variety list offers region-tested suggestions.
Companion Planting: Ecology-Based Pairings
Move beyond folklore. Science-informed companion planting leverages three observable mechanisms:
- Trap Cropping: Plant sacrificial crops to draw pests away. Nasturtiums may attract aphids away from beans. Blue hubbard squash can draw cucumber beetles away from zucchini.
- Repellent Pairing: Strong-scented herbs may confuse or deter pests. Basil near tomatoes is commonly associated with reduced hornworm pressure. Dill and parsley attract beneficial wasps that parasitize tomato hornworms. Marigolds (Tagetes spp.) release compounds studied for suppressing root-knot nematodes in soil (University of Florida research).
- Spatial Synergy: Tall plants provide shade for heat-sensitive crops. Corn supports pole beans; beans fix nitrogen beneficial to corn; squash leaves shade soil, suppressing weeds (the “Three Sisters” method, rooted in Indigenous agricultural knowledge).
Common Considerations:
* Alliums (onions, garlic) may inhibit growth of beans or peas—space accordingly.
* Fennel can inhibit growth of many vegetables—consider container planting.
* Start simply: tomatoes + basil + marigolds; carrots + onions (onion scent may mask carrot fly).
Succession Planting: Cultivating Continuous Harvests
Many gardens produce intensely for a few weeks, then taper. Productive gardens use succession planting—replacing harvested crops with new plantings—to keep beds active across seasons. This requires noting “harvest windows” and planning replant timing.
A Flexible Succession Planting Template (Customize Using Your Frost Dates):
* Early Spring (4–6 weeks before last frost): Plant cold-tolerant crops in Zone 3: peas, spinach, radishes, lettuce, kale. Simultaneously, start tomato/pepper seeds indoors if desired.
* Late Spring (2 weeks before last frost): Direct sow carrots, beets, parsnips. Transplant hardened-off tomatoes/peppers into Zone 2. As radishes finish, replant that space with bush beans.
* Early Summer (after last frost): Direct sow cucumbers, squash, corn, beans. Transplant basil. When early lettuce bolts, replace with heat-tolerant greens like New Zealand spinach.
* Mid-Summer (peak heat): Start fall crops in shade: sow kale, broccoli, Brussels sprouts seeds in trays. Direct sow okra, sweet potatoes. After harvesting spring carrots, plant daikon radish (matures in ~50 days) to help loosen soil.
* Late Summer (6–8 weeks before first fall frost): Transplant fall brassicas into Zone 3. Sow spinach, corn salad (mache), overwintering onions. After bush beans finish, consider a cover crop like crimson clover.
Example: In a Zone 6b garden (last frost ~April 15), a single 4×8 ft bed might yield:
* March 1: Spinach, radishes, lettuce
* May 10: Harvest radishes; replant with bush beans
* June 1: Harvest spinach; replant with trellised cucumbers
* July 15: Harvest lettuce; replant with fall carrots
* August 20: Harvest bush beans; replant with spinach for fall
* October 1: Harvest cucumbers; sow winter rye cover crop
This approach supports harvests across multiple months from one dedicated space.
Phase 3: The Momentum Phase (Late Spring to Early Summer) – Precision Planting & Establishment
Seeds hold potential. Seedlings represent progress. Thoughtful execution during establishment helps that potential flourish. This phase emphasizes attention to depth, spacing, timing, and gentle transition from protected environments to the open garden.
Seed Starting: Indoor vs. Direct Sow Guidance
Not all seeds benefit from indoor starts. Use this evidence-informed guide:
| Start Indoors (6–8 weeks before last frost) | Direct Sow Outdoors (After soil warms) | Why |
|---|---|---|
| Tomatoes, Peppers, Eggplants | Beans, Peas, Corn | Root crops (carrots) and legumes (beans) often resent root disturbance; direct sowing avoids transplant shock |
| Broccoli, Cauliflower, Cabbage | Carrots, Beets, Radishes | These need consistent soil moisture to germinate; challenging to maintain indoors |
| Celery, Leeks | Cucumbers, Squash, Melons | Large seeds (squash) germinate readily outdoors; heat-lovers need warm soil |
| Herbs (Basil, Parsley) | Lettuce, Spinach, Arugula | Cool-season crops may bolt if started too early indoors |
Seed Starting Best Practices:
1. Containers: Use cell packs or soil blocks. Sterilize reused trays with a diluted bleach solution.
2. Medium: Avoid garden soil (too dense, potential pathogens). Use a sterile, soilless seed-starting mix (peat/coco coir + perlite). Moisten until it holds shape when squeezed, then crumbles.
3. Planting Depth: General rule: plant seeds 2–3 times deeper than their width. Tiny lettuce seeds: surface-sow, press gently. Bean seeds: ~1 inch deep. Tomato seeds: ¼ inch deep.
4. Temperature: Bottom heat aids germination for warmth-loving crops. Use a seedling heat mat set to 70–75°F (21–24°C). Remove once sprouted.
5. Light: Window light is often insufficient. Use LED grow lights positioned 2–3 inches above seedlings, running 14–16 hours daily. Raise lights as plants grow.
6. Watering: Bottom-water trays to reduce fungal risks. Maintain consistent moisture—avoid soggy or bone-dry conditions.
7. Hardening Off (Essential Step): 7–10 days before transplanting, gradually expose seedlings to outdoor conditions. Start with 1 hour of shade on Day 1, increasing sun exposure and duration daily. Bring indoors if temperatures drop significantly. This acclimates plants to wind, sun, and temperature shifts.
Common Consideration: Starting seeds too early indoors without adequate light often leads to leggy, pale seedlings. Strong light later is preferable to weak light earlier.
Direct Sowing Techniques: Supporting Germination Success
Direct sowing success often hinges on soil temperature and moisture consistency.
- Soil Thermometer Use: Beans typically won’t germinate below 60°F (15°C); corn prefers 65°F+ (18°C+). Check soil temperature at planting depth for several mornings. Apps offer regional averages, but measuring your soil provides the most reliable data.
- The Trench Method for Rows: For carrots/beets: dig a shallow trench (¼ inch deep for carrots). Water the trench thoroughly before sowing. Sow seeds thinly. Cover lightly with fine soil or vermiculite. Lay a board over the row to retain moisture until sprouts appear (remove once visible). This helps prevent soil crusting—a common germination barrier.
- Spacing Guidance (Raised Beds):
- 1 plant per square foot: Tomatoes, peppers, broccoli
- 4 plants: Lettuce, spinach, bush beans
- 9 plants: Beets, onions, carrots
- 16 plants: Radishes, garlic
- Thinning Thoughtfully: Overcrowded seedlings compete for resources. Thin to final spacing when seedlings have 2 true leaves. Snip excess with scissors (avoid pulling to protect roots of keepers). Edible thinnings (radish, beet greens) can be enjoyed.
Transplanting With Care
- Water Seedlings thoroughly about an hour before moving.
- Prepare Hole: Dig slightly wider/deeper than root ball. Add compost and consider mycorrhizal fungi powder to support root establishment.
- Remove Container Gently: Squeeze cell packs; invert while supporting the stem base. Never pull seedling by the stem.
- Plant Depth (Tomatoes/Peppers): Bury stem up to the first set of true leaves—roots form along buried stem, creating stronger plants. Exception: Grafted tomatoes—keep graft union above soil.
- Water Immediately: A diluted kelp solution may help reduce transplant stress.
- Provide Temporary Shade: Use shade cloth or a small cardboard collar for 2–3 days if conditions are sunny or windy.
Phase 4: The Abundance Phase (Mid-Summer to Fall) – Maintenance, Harvest & Regeneration
This phase distinguishes sustained gardens from neglected ones. It’s not about constant labor—it’s about strategic, minimal interventions that support nature’s processes. Water deeply but infrequently. Mulch consistently. Harvest with purpose. Observe attentively.
Water Wisdom: Encouraging Deep Roots
Shallow, frequent watering encourages roots to stay near the surface, increasing vulnerability during dry spells. Deep, infrequent watering encourages roots to grow downward, accessing deeper moisture and nutrients.
- The Finger Test: Before watering, insert a finger 2 inches into soil. If dry, water deeply. If moist, wait.
- Drip Irrigation Benefits: Delivers water directly to roots, reducing evaporation and minimizing wet foliage (which can encourage disease). Install before planting. Run early morning (5–7 AM) to allow foliage to dry quickly.
- Watering Guidance by Stage:
- Seedlings: Light, frequent watering to keep top inch moist.
- Established Plants: Aim for 1–1.5 inches of water per week (including rain). Use a rain gauge. Water deeply 2–3 times weekly rather than lightly daily.
- Fruiting Stage (Tomatoes, Peppers): Consistent moisture helps prevent issues like blossom end rot (linked to uneven water affecting calcium uptake). Mulch heavily to maintain even soil moisture.
- Soil Adjustment: Sandy soil: water more frequently with less volume per session. Clay soil: water less frequently but longer to allow penetration.
Mulch: Nature’s Protective Layer
Mulch is among the most impactful ongoing practices. Benefits include:
* Suppressing weed growth (reducing labor)
* Conserving soil moisture (reducing watering needs)
* Regulating soil temperature (cooling roots in summer)
* Preventing soil compaction from heavy rain
* Gradually feeding soil as it decomposes
Mulch Selection Guidance:
* Straw (Versatile Choice): Lightweight, typically weed-free (ensure “straw,” not hay which contains seeds), good insulation. Apply 3–4 inches. Ideal for tomatoes, squash, pathways.
* Shredded Leaves: Free, nutrient-rich. Shred first to prevent matting. Excellent for garlic, onions, overwintering crops.
* Wood Chips (Pathways Only): Long-lasting for walkways. Avoid fresh wood chips in vegetable beds—they may temporarily tie up nitrogen during decomposition. Use only well-aged chips (>6 months) around perennial herbs.
* Grass Clippings (Use Judiciously): Apply thin layers (½ inch) only if untreated with herbicides. Thick layers may mat. Best composted first.
* Avoid: Plastic sheeting (traps heat, harms soil life long-term), dyed mulches (unknown chemical content).
Apply mulch after soil has warmed sufficiently in spring. Keep mulch 2 inches away from plant stems to reduce rot risk.
Integrated Pest Management (IPM): Ecological Balance
Shift from “pest control” to pest management—keeping populations below damaging levels while preserving beneficial insects. IPM follows a tiered approach:
Tier 1: Prevention (Foundation of Success)
* Healthy Soil Supports Resilient Plants: Plants with balanced nutrition often better withstand pest pressure. Assess and amend soil thoughtfully.
* Crop Rotation: Avoid planting the same crop family in the same spot consecutively. Example rotation: Year 1: Tomatoes (Solanaceae); Year 2: Beans (Fabaceae); Year 3: Lettuce (Asteraceae); Year 4: Carrots (Apiaceae). This disrupts pest and disease cycles.
* Row Covers: Lightweight fabric (e.g., Reemay) placed over hoops after planting can exclude pests like flea beetles (radishes), cabbage moths (broccoli), and cucumber beetles. Remove when plants flower for pollination (except for self-pollinating crops like beans).
* Diversity: Interplant flowers (alyssum, calendula, zinnias) to attract beneficial insects. Research, including University of California studies, notes gardens with flowering plant diversity often experience reduced pest outbreaks.
Tier 2: Monitoring & Identification
* Regular Observation: Spend a few minutes each morning inspecting undersides of leaves, stems, and soil line. Early detection is key.
* Accurate Identification: Is it a pest or a beneficial? Ladybug larvae consume aphids but resemble tiny alligators—avoid spraying them! Use apps like iNaturalist or extension guides. Take clear photos.
* Action Thresholds: One cabbage looper on kale may not require intervention. Ten causing visible defoliation might. Know your tolerance level.
Tier 3: Targeted Intervention (When Needed)
* Physical Removal: Hand-pick tomato hornworms (drop in soapy water). Spray aphids off with a strong water jet.
* Biological Controls: Release ladybugs for aphids (release at dusk near infestation). Use Bacillus thuringiensis (Bt) spray for caterpillars (generally safe for bees/beneficials).
* Organic Sprays (Spot Treat Only): Neem oil (disrupts insect feeding) for soft-bodied pests. Insecticidal soap for aphids/spider mites. Always test on one leaf first; apply early evening to minimize pollinator exposure.
Important Perspective: Some plant damage is natural. A few holes in kale leaves rarely ruin the crop. Perfectionism can lead to unnecessary interventions. Focus on overall plant vitality rather than cosmetic perfection.
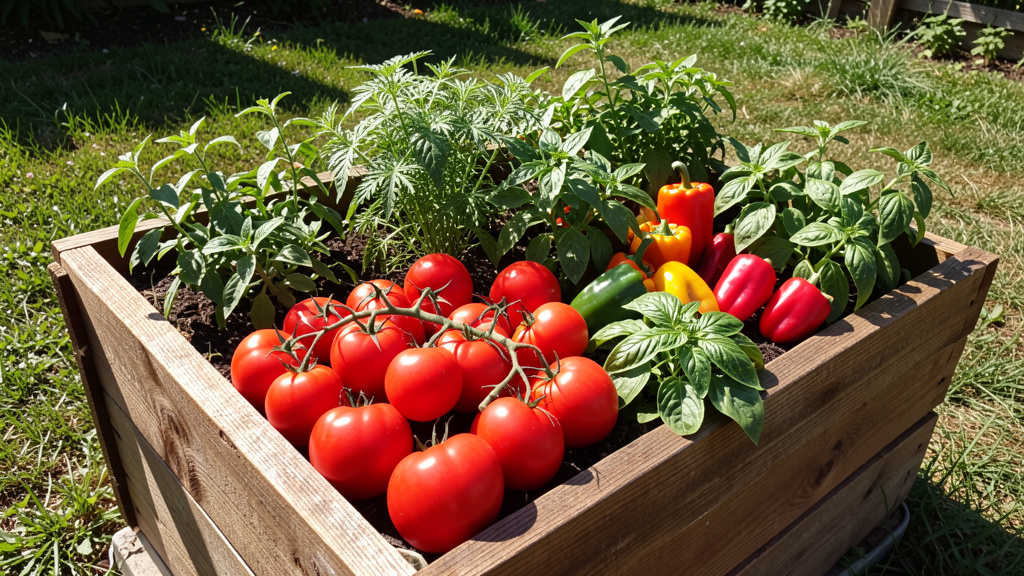
Harvesting for Flavor and Continued Production
Harvesting signals many plants to produce more. Timing and technique directly influence yield duration.
| Crop | When to Harvest | How to Harvest | Consideration |
|---|---|---|---|
| Lettuce/Spinach | Outer leaves 4–6″ long; before bolting | Cut outer leaves 1″ above soil; inner leaves regrow | Harvest in morning when crisp; store in damp cloth in fridge |
| Tomatoes | Fully colored, slightly soft at shoulder | Twist gently; leave small stem stub | Store stem-down at room temperature; avoid refrigeration |
| Zucchini | 6–8″ long (smaller = more tender) | Cut with knife; avoid tearing vine | Check plants daily in peak season—rapid growth occurs |
| Carrots | Shoulders ½–1″ diameter; verify by brushing soil | Loosen soil beside root; pull gently | Harvest after light frost for potentially sweeter flavor |
| Beans | Pods firm, snap easily; before seeds bulge | Pick frequently (every 2 days) to encourage production | Harvest dry beans when pods rattle; shell indoors |
| Herbs | Before flowering (peak oil concentration) | Cut stems just above a leaf node | Harvest in morning after dew dries; dry upside down in bundles |
The “Cut-and-Come-Again” Technique: For leafy greens, avoid pulling the whole plant. Using clean scissors, cut outer leaves 1–2 inches above the crown (growing point). New leaves emerge from the center within days. One planting of Swiss chard can yield for months with this method.
End-of-Season Regeneration: Preparing for Next Year
As frost approaches, thoughtful actions support future seasons.
- Clear Spent Plants: Remove diseased plants (e.g., tomato blight, powdery mildew) and dispose of in trash (not home compost). Healthy plant debris can be added to compost.
- Plant Cover Crops: In empty beds, sow crimson clover (fixes nitrogen) or winter rye (prevents erosion). Incorporate into soil 3 weeks before flowering next spring.
- Amend Soil: Based on season observations and fall soil assessment, add needed amendments. Incorporate 1–2 inches of compost. For acidic soils, lime applied in fall allows time to react.
- Tool Care: Clean, sharpen, and oil tools. Store in a dry place to prevent rust and save time next spring.
- Garden Journaling: Record what worked, challenges faced, planting dates, varieties. This evolving document becomes increasingly valuable.
Deep Dives: Mastering Critical Sub-Systems
Soil Building Continuum: Ongoing Nurturing
Soil health is a journey, not a destination. View organic matter as a living resource. Each season, add “deposits” (compost, cover crops) and minimize “withdrawals” (compaction, bare soil).
Composting Fundamentals: Carbon + Nitrogen + Oxygen + Water
* Browns (Carbon): Dry leaves, straw, shredded paper. Provide structure.
* Greens (Nitrogen): Vegetable scraps, coffee grounds, fresh grass clippings. Fuel decomposition.
* Target Balance: Roughly 25–30 parts carbon to 1 part nitrogen. Too many browns? Decomposition slows. Too many greens? Pile may become smelly.
* Hot Composting (Faster): Build pile 3x3x3 ft. Layer greens/browns. Moisten to “damp sponge” consistency. Turn every 3–4 days. Reaches temperatures that reduce weed seeds/pathogens. Ready in weeks to months.
* Cold Composting (Simpler): Add scraps to bin; mix in browns occasionally. Turn rarely. Takes many months. Suitable for small households.
* Troubleshooting:
* Odor? Add browns; turn for aeration.
* Not breaking down? Too dry (add water) or too small (build larger pile).
* Pests attracted? Bury food scraps under browns; avoid meat/dairy/oils.
Vermicomposting (Worm Bins): Ideal for small spaces. Red wiggler worms (Eisenia fetida) process kitchen scraps in stacked bins. Output: nutrient-rich castings. Keep bin in a protected area (worms sensitive to temperature extremes). Feed moderately; avoid citrus/onions in large quantities.
Biochar Consideration: Created by heating organic matter in low-oxygen conditions. Its porous structure offers habitat for microbes and retains nutrients/water. Important: “Charge” biochar by soaking in compost tea or mixing with compost for 1–2 weeks before soil application. Uncharged biochar may temporarily bind nutrients.
Water Systems: Efficiency and Adaptation
Water is a precious resource. Thoughtful systems conserve time and support plants.
Drip Irrigation Setup Overview:
1. Plan: Sketch bed layout and plant locations.
2. Components: Timer (convenience), backflow preventer (often required), pressure regulator (drip systems need ~25 PSI), filter, mainline tubing, emitter lines, stakes.
3. Install: Lay mainline along bed edge. Attach emitter lines to each plant. Stake tubing. Flush system before final connection.
4. Program: Set timer for early morning. Start with conservative run times (e.g., 20 minutes, 3x/week). Adjust based on weather and plant response. Consider a rain sensor for automatic shutoff.
Ollas (Unglazed Clay Pots): Bury porous pot neck-deep near plants. Fill with water; it seeps slowly to roots. Minimal evaporation. Effective for tomatoes, squash in dry climates. DIY option: seal drainage hole of terracotta pot with food-safe silicone; bury; cover top with saucer.
Rainwater Harvesting: Place barrel under downspout. Use screen to block debris/mosquitoes. Elevate barrel for gravity flow. Check local regulations regarding rainwater collection.
Pest & Disease Response: Observation and Ecology
Accurate identification guides effective response.
- Holes in Leaves?
- Smooth edges: Slugs/snails (check at night; use beer traps or copper tape barriers).
- Jagged edges: Caterpillars (hand-pick; consider Bt spray if needed).
- Shot-hole pattern: Flea beetles (use row covers; trap crop with radishes).
- Yellowing Leaves?
- Between veins: Possible iron deficiency (common in high pH soils; consider chelated iron if confirmed).
- Older leaves first: Possible nitrogen deficiency (side-dress with compost).
- Mottled pattern: Possible viral disease (remove affected plant; manage aphids that may spread viruses).
- White Powder on Leaves? Powdery mildew (common on squash). Prevent with spacing for air flow; at first sign, spray diluted milk solution (1 part milk to 9 parts water). Remove severely affected leaves.
Beneficial Insect Habitat:
* Ladybugs/Lacewings (Aphid Predators): Plant dill, fennel, yarrow, cosmos.
* Parasitic Wasps (Caterpillar Parasitizers): Plant alyssum, dill, cilantro.
* Ground Beetles (Slug Predators): Leave small undisturbed areas; mulch heavily.
* Hoverflies (Aphid Predators): Plant marigolds, zinnias, sunflowers.
Create a flowering border around garden edges. Avoid broad-spectrum sprays—they harm beneficial insects alongside pests.
Small Space & Container Strategies
Productivity adapts to available space.
Container Selection Guidance:
* Size Matters: Tomatoes need 5+ gallon pots; peppers 3+ gallons; lettuce 1–2 gallons. Larger pots buffer moisture/temperature fluctuations.
* Drainage Essential: Must have drainage holes. Elevate pots on feet.
* Material Notes:
* Fabric Pots: Good aeration; prevent root circling; dry faster (monitor water).
* Terracotta: Breathable; heavy; dries quickly.
* Plastic: Lightweight; retains moisture; verify food-safe resin codes (#2, #4, #5).
* Self-Watering Containers: Reservoir system reduces watering frequency. Helpful for travel.
Potting Mix Formula (Avoid Garden Soil):
* 1 part coconut coir (or peat moss)
* 1 part compost
* 1 part perlite (or coarse sand)
* Optional: Small amount of worm castings per gallon
Vertical Growing Options:
* Trellises: For cucumbers, pole beans, small squash. Cattle panels offer sturdy, affordable support.
* Pocket Planters: Felt pockets on fences for strawberries, herbs, lettuce.
* Stackable Systems: Tiered planters maximize vertical space.
* Window Boxes: Suitable for herbs, lettuce, radishes. Ensure secure mounting.
Balcony Microclimate Awareness: Wind intensifies on balconies—use bamboo screens. South-facing areas receive intense sun; select heat-tolerant varieties. North-facing spots suit shade-tolerant crops (lettuce, spinach). Grouping pots can create beneficial micro-humidity.
Season Extension: Harvesting Beyond First Frost
Extend harvests by weeks with accessible methods.
- Cold Frames: Wood frame topped with old window or clear lid. Traps solar heat; protects fall crops. Ventilate on sunny days. Ideal for spinach, kale, carrots.
- Row Covers: Lightweight fabric (Agribon AG-19) offers light frost protection (2–4°F / 1–2°C). Heavier weight (AG-30) provides more protection (6–8°F / 3–4°C). Drape over hoops; secure edges.
- Cloches: Individual plant covers (cut plastic bottles, milk jugs). Protect early seedlings from late frosts.
- Low Tunnels: Hoops (PVC, bent wire) covered with plastic. Creates greenhouse effect. Remove plastic on warm days to prevent overheating.
- Overwintering Crops: Plant garlic, onions, spinach, kale in late summer. They go dormant in winter, resume growth early spring. Harvest before summer heat triggers bolting.
Tip: Place black-painted water jugs inside cold frames or tunnels. They absorb daytime heat and release it slowly overnight.
Navigating Common Garden Challenges: Practical Responses
Even experienced gardeners encounter setbacks. Thoughtful response matters more than perfection. Below are frequent challenges with root-cause considerations and actionable steps—aligned with guidance from cooperative extension resources.
“My Seeds Didn’t Germinate”
- Possible Factors: Soil too cold; planted too deep; soil dried out; seed viability; wildlife disturbance.
- Response Path: Verify soil temperature matches seed requirements (use thermometer). For future: start cold-sensitive seeds indoors if soil is cool; cover seeded rows with board until sprouts appear; source fresh seeds from reputable suppliers; cover seeded area with floating row cover after sowing.
“My Tomato Seedlings Are Tall and Spindly”
- Possible Factors: Insufficient light; overcrowded seedlings; started too early.
- Response Path: Provide supplemental light (LED grow lights positioned close to plants). Thin seedlings early. Next season: start tomatoes 6–8 weeks before last frost—not earlier. For existing plants: plant deeply (bury stem) to encourage stronger root development.
“My Zucchini Produced One Fruit Then Declined”
- Possible Factors: Poor pollination; squash vine borer; disease pressure.
- Response Path: Hand-pollinate: transfer pollen from male flower (straight stem) to female flower (swollen base) using a small brush or removed male flower. For borers: wrap stem base with aluminum foil; check for sawdust-like frass. For mildew: improve air circulation; spray diluted milk solution at first sign.
“My Carrots Are Forked or Misshapen”
- Possible Factors: Rocky or compacted soil; fresh manure; inconsistent moisture.
- Response Path: Prepare bed deeply (12+ inches), removing stones and debris. Use well-rotted compost (avoid fresh manure). Maintain even soil moisture. Consider shorter carrot varieties (‘Parisian’, ‘Thumbelina’) in heavier soils.
“Plants Were Damaged Overnight”
- Possible Factors: Slugs/snails (smooth holes); rabbits (clean cuts); deer (ragged tears).
- Response Path: For slugs: beer traps, copper tape barriers, diatomaceous earth (reapply after rain). For rabbits/deer: fencing (chicken wire buried slightly), motion-activated sprinklers, repellent sprays (rotate types). Identify culprit first for targeted response.
“My Soil Is Very Hard and Compacted”
- Possible Factors: Heavy clay; soil compaction from foot traffic; low organic matter.
- Response Path: Avoid walking on planting beds. Consider raised beds filled with quality mix. For in-ground: loosen soil carefully, incorporate compost generously, add 3–4 inches of mulch on top. Plant deep-rooted cover crops (daikon radish) to help break up subsoil. Improvement takes patience—consistent effort over 2–3 seasons yields noticeable change.
Gardeners who adopt systematic approaches to soil care and succession planting frequently report greater satisfaction and extended harvest periods, as noted in surveys by gardening organizations. The key lies not in avoiding all challenges, but in applying a resilient framework.
Your Questions, Answered
Q: How can I assess soil health without a lab test?
A: Try these field observations: Squeeze Test: Grab moist soil. It should form a loose ball that crumbles when poked (indicative of loam). Sandy soil won’t hold shape; clay forms a hard ball. Earthworm Check: Dig 1 sq ft x 6″ deep. Finding several earthworms suggests good biological activity. Fewer may indicate compaction or low organic matter. Plant Clues: Vigorous growth, deep green color, and strong roots signal health. Stunted growth or yellowing may indicate issues. For precise nutrient data, a mail-in test through your Cooperative Extension remains the most reliable option—many offer affordable pricing.
Q: Can I regrow plants from grocery store vegetable scraps?
A: Selectively, with managed expectations. Green onion roots, celery bases, and lettuce stumps may regrow some leaves in water for short-term use, but rarely produce substantial new harvests. For propagation: Potatoes: Cut pieces with 2 “eyes,” let dry 24 hours, plant (note: store potatoes may be treated to inhibit sprouting). Garlic: Plant individual cloves (pointy end up). Sweet Potatoes: Suspend tuber in water; sprouts (“slips”) can be planted. Tomatoes: Ferment seeds from heirloom tomatoes (not hybrids), dry, save. For reliable results, certified seed potatoes or fresh seeds are recommended.
Q: How often should I fertilize, and what type is best?
A: Fertilize based on plant needs and soil assessment—not a fixed schedule. Heavy feeders (tomatoes, corn, squash) may benefit from side-dressing with compost or balanced organic fertilizer at flowering and fruit set. Light feeders (beans, peas, carrots) often thrive with soil rich in organic matter alone. Avoid high-nitrogen fertilizers on fruiting crops—they may promote leafy growth over flowers/fruit. In organic systems, compost is the cornerstone. Kelp meal offers trace minerals at planting or flowering. Always water after applying dry amendments to prevent root contact issues.
Q: My garden gets only 5 hours of sun. What can I realistically grow?
A: Focus on crops tolerant of partial shade (4–6 hours sun): lettuce, spinach, arugula, kale, Swiss chard, radishes, beets, carrots, scallions, and herbs like parsley, cilantro, mint. Avoid fruiting crops (tomatoes, peppers, cucumbers) which generally require full sun. Maximize available light: paint nearby fences white to reflect light; keep area clear of low branches; use light-colored mulch to bounce light upward. If possible, consider container gardening on a sunnier patio or balcony.
Q: Is it safe to compost diseased plants?
A: Generally, avoid adding severely diseased plant material (e.g., tomato blight, powdery mildew) to home compost piles. Most home systems don’t reach sustained high temperatures needed to kill pathogens. Dispose of heavily diseased plants in municipal trash (not curbside compost unless your program guarantees high-heat processing). Exception: Minor issues like a few aphid-infested leaves may be acceptable in a hot, active compost pile. When uncertain, prioritize long-term garden health.
Q: How do I keep squirrels or birds from digging up my seeds?
A: Physical barriers work best. Immediately after sowing, cover the bed with floating row cover secured with soil or pins. Remove once seedlings emerge. Bird netting over hoops offers broader protection. Deterrents like blood meal or cayenne pepper offer temporary relief but wash away with rain. Motion-activated sprinklers may deter persistent squirrels. Planting seeds slightly deeper than recommended can also help—many diggers target shallow depths.
Q: What’s the difference between determinate and indeterminate tomatoes?
A: Determinate (bush) tomatoes grow to a predetermined height (3–4 ft), set fruit over a concentrated period (2–3 weeks), then decline. Ideal for containers, canning, or shorter seasons. Examples: ‘Roma’, ‘Bush Early Girl’. Indeterminate (vining) tomatoes grow continuously until frost, producing fruit steadily over months. Require sturdy support. Ideal for extended fresh harvests. Examples: ‘Cherokee Purple’, ‘Sweet Million’. Most heirlooms are indeterminate. Seed packets always specify type.
Q: Can I save seeds from this year’s harvest for next year?
A: Yes, but only from open-pollinated or heirloom varieties—not hybrids (marked F1). Hybrid seeds won’t reliably “come true” (offspring differ from parent). For self-pollinating crops (tomatoes, peppers, beans, lettuce), seed saving is straightforward: harvest ripe fruit, extract seeds, ferment tomato seeds 3 days to remove gel, rinse, dry thoroughly on a plate, store in a labeled envelope in a cool, dark place. For cross-pollinating crops (squash, cucumbers, corn), isolation distances are needed to prevent cross-breeding—challenging in home gardens. Start with beans or tomatoes for easier success.
Q: How do I manage weeds without chemicals?
A: Prevention is highly effective. Before Planting: Solarize soil (cover moist soil with clear plastic for 4–6 weeks in hot sun) to reduce weed seeds. During Season: Mulch heavily (3–4 inches straw) to block light. Use drip irrigation (water plants, not weeds). Plant crops close together to shade soil. Weeding Technique: Pull weeds after rain when soil is moist; remove entire root. Use a stirrup hoe for shallow weeds on dry days—slices weeds at soil line with minimal soil disturbance (reduces bringing new seeds to surface). Consistent, brief sessions are more effective than infrequent deep weeding.
Q: My basil keeps flowering. How do I encourage leafy growth?
A: Pinch off flower buds as soon as they appear—before they open. This redirects energy into leaf production. Harvest regularly: cut stems just above a pair of lower leaves to encourage branching. If flowers open, cut the stem back to the next set of leaves. Heat-tolerant varieties like ‘Italian Large Leaf’ may resist bolting longer. In peak heat, providing afternoon shade if possible can help. Note: once basil flowers significantly, leaf flavor may change—prioritize frequent harvesting.
Conclusion and Your Next Step
You now hold a flexible, season-aware system—not just isolated tips—for cultivating a garden that nourishes body and spirit while supporting the living world beneath your feet. Let’s crystallize the journey:
Three Enduring Pillars:
1. Soil as Living Foundation: Every decision flows from soil health. Assess, nurture, mulch, and protect it consistently. Healthy soil supports resilient plants with less intervention.
2. Design Aligned With Seasons: Plan zones, embrace succession planting, and choose crops suited to your space and climate. Work with natural rhythms. Abundance follows thoughtful design.
3. Observation and Adaptation: Your garden is a unique ecosystem. Spend quiet moments watching. Notice which plants thrive where. Adjust next season based on this year’s insights. Gardening is a responsive dialogue.
This framework transforms gardening from a seasonal task into a meaningful practice of connection. The carrots you harvest carry the story of nurtured soil. The morning salad embodies patience and care. These moments contribute to well-being—a perspective supported by research linking gardening to reduced stress and strengthened community ties.
The 24-Hour Step: One Small Action
Do not wait for “perfect” conditions. Within the next 24 hours, complete one of these:
* Starting fresh: Sketch a simple map of your space. Note sun patterns observed today. Measure dimensions.
* Existing garden: Remove five weeds. Then, place your trowel and watering can by the back door for tomorrow.
* Limited space: Order one packet of ‘Salad Bowl’ lettuce seeds and one bag of potting mix. Identify a sunny windowsill.
Action builds momentum. Momentum builds confidence. This single step bridges intention and reality.
The Wider Context: Your Garden in the Living World
Your garden is more than a food source. It’s habitat for pollinators and beneficial insects. A living classroom. A contribution to local biodiversity. A mindful practice in a fast-paced world. Each seed saved, each chemical avoided, each worm protected creates ripples. You are cultivating resilience—one square foot, one season, one thoughtful choice at a time. The soil responds to care. The harvest rewards patience. And the journey? It nourishes far more than the body.
Explore Our Complete Garden System:
Building Living Soil from Scratch | Mastering Seed Starting Indoors | Organic Pest Management Strategies | Small Space Harvest: Container Gardening Deep Dive | Season Extension Handbook: Grow Across Seasons | The Home Composter’s Practical Guide | Water-Wise Gardening: Efficient Systems for Every Climate