Unlock Healthier Plants, Smarter Soil, and a Garden That Works With You—Not Against You
Raised bed gardening transforms how we interact with the earth beneath our feet. It’s not merely about elevating soil—it’s a holistic approach that addresses drainage challenges, soil quality concerns, physical accessibility barriers, and space limitations all at once. This guide delivers every detail you need: from evidence-based advantages and nuanced material comparisons, to adaptable construction methods for slopes, small patios, or expansive backyards. Whether you’re planting your first seedling or redesigning an established space, you’ll gain actionable strategies to build a thriving, sustainable garden ecosystem tailored precisely to your environment and goals.
Introduction
Walk through community gardens, suburban backyards, or urban rooftops today, and you’ll frequently encounter the structured frames of raised beds. Their enduring presence spans centuries—from Aztec chinampa systems on Lake Texcoco to French maraîchers supplying 19th-century Paris and Indigenous land stewardship practices across continents. This longevity reflects a timeless solution to fundamental gardening challenges. Agricultural research consistently notes benefits such as improved yield density and efficient water use compared to traditional row gardening. Beyond productivity, raised beds broaden accessibility for gardeners managing mobility considerations, poor native soil, or limited space. This guide synthesizes horticultural principles, material science insights, and practical design wisdom into a cohesive resource. We explore why certain approaches endure, how soil biology functions uniquely in contained environments, and what thoughtful choices—like corner reinforcement or soil layering—support years of resilient harvests. Your journey begins with understanding the synergy between intentional structure and living soil.
The Four-Pillar Framework for Raised Bed Mastery
True raised bed success rests on four interconnected pillars. Neglect one, and the system weakens. Master all four, and you cultivate not just plants, but a self-sustaining ecosystem. This framework moves beyond fragmented tips to provide a cohesive mental model. Each pillar builds upon the previous, creating compounding benefits. We’ll examine material science, ergonomic principles, soil ecology, and adaptive design—so you can confidently customize every decision to your unique context.
Pillar 1: Strategic Advantages—Why Elevation Changes Everything
Raised beds are often chosen for convenience, but their deepest value lies in solving persistent gardening challenges at their root. Understanding these advantages shifts your approach from reactive troubleshooting to proactive design.
Superior Soil Control and Customization
Native soil presents variables: heavy clay that restricts roots, sandy patches that drain too rapidly, hidden debris, or historical chemical residues. Raised beds grant sovereignty over your growing medium. You create an environment tailored to specific crops—blueberries thrive in acidic, peat-rich mixes; carrots need deep, stone-free, sandy loam; Mediterranean herbs prefer gritty, fast-draining substrates. This precision reduces uncertainty. Research from agricultural extensions indicates gardens using custom soil blends often show fewer nutrient deficiency symptoms and smoother plant establishment. For urban gardeners concerned about soil history, raised beds with clean soil and root barriers provide a practical safety layer aligned with public health guidance for urban food production.
Enhanced Drainage and Aeration: The Root Zone Revolution
Waterlogged soil deprives roots of oxygen, inviting disease and leaching nutrients. Raised beds elevate roots above problematic drainage planes. Gravity aids percolation through a thoughtfully blended soil mix rather than pooling. This supports optimal soil structure—maintaining pore space for air, water, and microbial activity. Beneficial bacteria and mycorrhizal fungi thrive in well-aerated conditions. During heavy spring rains, an in-ground garden may stay saturated for days, delaying planting. A raised bed typically drains within hours, enabling earlier planting and reducing disease pressure. On slopes, raised beds act as terraced retention units, holding soil and moisture where plants need it. In areas with high water tables, elevating beds 18–24 inches provides critical root protection.
Accelerated Soil Warming and Extended Seasons
Soil in raised beds warms more readily in early spring due to exposure on multiple sides. This thermal advantage can allow cool-season crops like spinach, radishes, and peas to be planted slightly earlier. In autumn, retained warmth may extend the harvest window for kale, carrots, and beets. Studies from agricultural institutions note raised beds often reach workable planting temperatures sooner than flat ground. Paired with season-extension tools (covered later), this can meaningfully lengthen your productive window. For gardeners in shorter-season climates, this difference supports heat-loving crops. Even in mild zones, earlier warming encourages robust root development before summer heat arrives.
Dramatically Reduced Weed Pressure and Maintenance
Weeds compete fiercely for resources. Raised beds disrupt this cycle. Starting with weed-free soil eliminates existing seed banks. Defined borders create physical barriers against encroaching grasses and perennial weeds. Dense planting within beds—using methods like square-foot spacing—creates a living mulch where crop foliage shades the soil surface, inhibiting weed germination. Gardeners often report spending significantly less time weeding raised beds versus comparable in-ground areas. Reduced soil disturbance also preserves soil structure and microbial networks. Maintenance shifts from constant battle to brief, strategic observation. For those with physical limitations, this reduction in repetitive motion transforms gardening into a sustainable, joyful practice.
Ergonomic Accessibility and Inclusive Design
Standard raised beds (12–18 inches tall) reduce bending and kneeling. For individuals managing arthritis, back sensitivity, or limited mobility, this difference is profound. Beds built to 28–36 inches function as standing-height gardens. Adding a smooth, wide cap creates a resting ledge. Wheelchair-accessible designs incorporate clearance beneath the frame with reinforced supports. Horticultural therapy resources highlight raised beds as vital tools for inclusive gardening across ages and abilities. Children engage more readily with beds at their height. This inclusivity fosters connection—grandparents and grandchildren gardening side-by-side without strain. When physical barriers diminish, attention redirects to observation, learning, and connection with plant life.
Pest and Critter Deterrence Through Design
While no garden is entirely pest-proof, raised beds introduce strategic defensive layers. Elevation alone deters slugs and snails, which avoid crossing dry, exposed edges. Installing hardware cloth (¼-inch galvanized mesh) across the entire bottom before adding soil creates a barrier against burrowing rodents—a persistent challenge in many regions. Defined perimeters simplify protection: floating row covers anchor securely; copper tape applied to wooden sides may deter slugs; fine mesh netting over hoops excludes specific insects. Raised beds also facilitate precise companion planting—interplanting basil among tomatoes or nasturtiums as aphid traps becomes manageable within contained spaces. This proactive approach supports integrated pest management principles, reducing reliance on reactive interventions.
Space Efficiency and Aesthetic Integration
In compact yards, balconies, or patios, every inch counts. Raised beds maximize productivity per square foot through intensive planting. Unlike row gardening requiring wide machinery paths, raised beds concentrate growth in accessible zones with narrow pathways (18–24 inches) between them. A 4×8-foot bed often yields more than a comparable in-ground area due to optimized spacing. This efficiency enables food production in previously challenging spaces: atop patios (with drainage layers), on slopes (terraced), or along narrow side yards. Aesthetically, raised beds bring order and intentionality. Uniform lines create visual calm; material choices (cedar, stone, steel) complement architectural styles. They define garden rooms, guide foot traffic, and elevate plantings for better appreciation. Community gardens use standardized dimensions for equitable, manageable plots. Thoughtfully designed beds reflect stewardship—a detail noted in landscape evaluation contexts.
The Fundamental Principle: A raised bed is not merely a container for soil—it is a deliberately engineered micro-ecosystem where structure, biology, and human interaction converge to amplify nature’s potential.
Pillar 2: Material Mastery—Choosing Wisely for Longevity and Safety
Selecting materials involves balancing budget, aesthetics, environmental considerations, and long-term performance. Thoughtful choices prevent premature failure or unnecessary maintenance. Let’s examine options with practical clarity.
Wood: The Classic Choice—Decoded
Wood remains popular for its natural appearance, workability, and moderate thermal properties. Durability depends on species and treatment.
Cedar and Redwood: Valued for natural rot resistance due to heartwood oils. Western Red Cedar typically lasts many years; Alaskan Yellow Cedar and Redwood offer similar longevity where available. Critical nuance: Specify “heartwood” or “clear grade.” Sapwood lacks protective oils and deteriorates faster. Reputable suppliers label grades; avoid mixes with high sapwood content. For eco-conscious choices, seek Forest Stewardship Council (FSC)-certified sources.
Hemlock, Pine, Fir (Untreated): Budget-friendly but shorter-lived. Suitable for temporary beds or very dry climates. If chosen, extend life by lining the interior with punctured polyethylene sheeting to reduce moisture contact. Avoid pressure-treated lumber manufactured before 2004 (contains arsenic-based compounds). Modern pressure-treated wood (post-2004, labeled ACQ or CA) is approved for vegetable gardens by regulatory bodies, though some prefer interior lining with landscape fabric as a precaution. Copper accumulation in soil over decades is a consideration for organic-focused gardens.
Black Locust and Osage Orange: Exceptionally dense, rot-resistant native hardwoods with multi-decade lifespans. Often locally sourced as fence posts. Very hard—requires pre-drilling. Sustainability depends on local availability; avoid long-distance transport.
Composite and Recycled Materials: Modern Innovation
Made from recycled wood fibers and plastic, composites resist rot, insects, and warping. Advantages include low maintenance and consistent appearance. Considerations: Darker colors absorb heat in full sun—potentially warming soil more than desired for cool-season crops. Verify non-toxicity certifications. Some composites may sag under soil weight over time; select products rated for structural use. Cost is higher upfront but may justify reduced replacement cycles. Ideal for high-traffic areas or gardens prioritizing smooth, splinter-free surfaces.
Masonry: Stone, Brick, and Concrete Block—Permanent Elegance
These materials create enduring structures with significant thermal mass (absorbing daytime heat, releasing it slowly at night—beneficial in cooler climates). Dry-stacked stone allows drainage and root interaction at edges. Mortared constructions become permanent landscape features. Concrete blocks are affordable and modular; hollow cores can hold additional plantings. Essential precautions: Use new, certified concrete blocks (avoid older cinder blocks with potential contaminants). For stone/brick, ensure foundations extend below the frost line in cold zones to prevent heaving. Mortar selection matters: Type N masonry cement suits above-grade work. Initial labor is higher, but these beds become virtually maintenance-free. They excel on slopes requiring terracing. Aesthetic versatility ranges from rustic fieldstone to contemporary brick.
Metal: Corten Steel and Galvanized—Contemporary Durability
Corten steel develops a stable rust-colored patina; galvanized steel uses a zinc coating for protection. Both conduct heat—significant in hot climates. Mitigation: Line the interior with rigid foam insulation board before adding soil to buffer root zones. Ensure metal is food-safe grade; avoid salvaged industrial containers with unknown histories. Corten runoff during initial weathering may stain light surfaces—position thoughtfully. Metal beds suit modern landscapes, rooftops (lightweight vs. stone), and areas needing clean lines. They resist rodent damage better than wood. For galvanized steel, verify coating integrity at cut edges.
Alternative and Upcycled Materials: Creative Solutions
Food-Grade Barrels: Cut lengthwise, sanded smooth. Confirm original contents were non-toxic (e.g., olive oil, soy sauce barrels). Drill ample drainage holes. Limited lifespan but very low cost.
Wine Crates: Charming for small herb gardens. Line with landscape fabric; best as decorative accents.
Straw Bales: Temporary seasonal beds. Condition bales properly before planting directly into decomposing straw. Excellent for renters or trial gardens.
Reclaimed Brick/Stone: Sustainable and character-rich. Inspect thoroughly for cracks or residues; clean well.
⚠️ Critical Avoidances: Railroad ties (creosote), old tires (chemical leaching), pre-2004 pressure-treated wood, painted wood with unknown paint history. When uncertain, prioritize soil and user safety.
Material Comparison Guidance
| Material | Typical Lifespan | Relative Cost | Climate Notes | Key Consideration | Sustainability Note |
|——————-|——————|—————|——————–|—————————————|———————|
| Cedar (Heartwood) | 15-25+ years | $$$ | All | Specify “clear heart” grade | Seek FSC-certified |
| Composite | 25+ years | $$$$ | All | Check heat absorption in full sun | Verify recycled content |
| Concrete Block | 50+ years | $$ | Cold (thermal mass)| Use new, certified blocks | Moderate impact |
| Corten Steel | 25+ years | $$$$ | Dry/Moderate | Insulate interior in hot climates | Recyclable |
| Untreated Pine | 3-7 years | $ | Dry | Line interior; temporary solution | Low impact |
| Stone (Dry Stack) | Generational | $$$$+ | All | Requires masonry skill | Very low impact |
Sourcing Mindfully
– For wood: Request certification documentation. Avoid uncertified tropical hardwoods.
– For composites: Inquire about post-consumer recycled content.
– For metal: Choose suppliers emphasizing recycled content and non-toxic coatings.
– For stone: Source locally when possible to reduce transport emissions.
– Consider “cost per year of service”: A higher initial investment in durable materials often proves more economical and sustainable long-term.
Pillar 3: Structural Integrity—Engineering for Decades of Service
A stable, level bed prevents future frustration. Structural soundness stems from physics-aware design, not just material choice. We’ll break down dimensions, joinery, and terrain adaptation with practical precision.
Optimal Dimensions: Balancing Access and Stability
Width: Keep to 4 feet maximum. This allows comfortable reach to the center from either side without stepping into the bed (which compacts soil). For beds against a wall, limit width to 2–3 feet for single-sided access. Length: Dictated by your space and material lengths. Standard 4×8 feet works well. Longer beds (>12 feet) benefit from mid-span bracing to prevent bowing. Height: Minimum 6 inches for shallow herbs; 12 inches suits most vegetables; 18–24 inches benefits root crops and accessibility needs. Taller beds (>24 inches) require reinforcement—soil exerts significant lateral pressure, especially when wet. Insight: Height affects soil volume and moisture retention. Deeper beds buffer against drought but require more fill material.
Foundation and Site Preparation: The Unseen Foundation
Thorough site prep prevents future issues. Follow this sequence:
1. Clear and Level: Remove sod, weeds, and debris. Use a string level or laser level to check grade. Building on unlevel ground stresses joints over time.
2. Address Slopes: For gentle slopes (<10%), terrace beds stepping down the hill. For steeper slopes, consult a landscape professional; retaining walls over 18 inches may require engineered design.
3. Weed Barrier (Optional): Lay cardboard or multiple layers of newspaper directly on soil before placing the frame. This smothers existing weeds without impeding drainage or earthworm movement. Overlap seams by 6 inches. Exception: If burrowing rodents are present, use hardware cloth here instead.
4. Leveling the Frame: Place the frame on-site. Use a 4-foot level on top edges. Shim low spots with flat stones or wood shims—not soil, which compresses. Recheck level after adding initial soil weight.
5. Pathway Preparation: Between beds, lay landscape fabric topped with 2–3 inches of crushed gravel or wood chips. Prevents mud, defines space, and protects frame bases from equipment damage.
Joinery Techniques: From Simple to Reinforced
Basic Corner Posts (Recommended for Wood):
– Cut 4×4 or 6×6 posts longer than bed height (e.g., for an 18″ bed, use 30″ posts).
– Sink posts 12 inches into the ground at each corner (below frost line in cold climates to prevent heaving).
– Attach side boards to posts using galvanized deck screws (pre-drill to prevent splitting).
– Why it works: Posts bear lateral soil pressure; boards remain in compression. This is significantly stronger than butting boards directly.
Reinforcement for Tall Beds (>18″):
– Add mid-span posts every 4 feet along long sides.
– Install diagonal corner braces (cut boards at 45°) screwed to post and side board.
– For beds over 24″, consider “deadman” anchors: horizontal boards screwed perpendicularly to the outside frame, buried deeply.
Metal Bracket Systems: Commercial kits use powder-coated steel brackets. Fast assembly, no digging. Ensure brackets are rated for your bed dimensions. Ideal for patios over solid surfaces.
Masonry Techniques: Dry-stack stone requires interlocking courses. For mortared builds, consult local codes for structures over 24 inches tall. Always prioritize safety on slopes.
Step-by-Step Construction: A Weekend Project Blueprint
Tools Needed: Tape measure, level, drill/driver, shovel, mallet, safety glasses, work gloves.
Materials for 4x8x18″ Cedar Bed: (4) 2x12x8′ cedar boards, (4) 4x4x30″ cedar posts, (48) 3″ exterior screws, hardware cloth (optional), cardboard.
1. Prepare Site: Clear a 5×9 foot area. Level thoroughly. Lay cardboard over soil.
2. Position Posts: Place posts at corners, aligning to your 4×8 footprint. Temporarily brace upright.
3. Attach First Board Layer: Place one 8-foot board against posts on a long side. Drill pilot holes. Secure with screws per post. Repeat opposite side. Attach end boards.
4. Check Square: Measure diagonals (corner to corner). Adjust until measurements match exactly.
5. Add Remaining Layers: Stack additional boards, staggering seams away from corners. Secure to posts.
6. Install Bottom Barrier (Recommended): Cut hardware cloth to interior dimensions. Staple securely to bottom edges before final placement. Overlap seams; secure tightly. This blocks burrowers long-term.
7. Final Placement: Lift assembled frame onto prepared site. Re-level. Drive posts into ground using a mallet (protect top with scrap wood). Re-check level.
8. Reinforce (If Needed): Add braces or mid-span posts for taller beds.
9. Pathways: Install gravel or mulch pathways immediately to protect the frame base.
Safety Note: Wear gloves when handling wood. Work with a partner for lifting heavy frames.
Adapting to Challenging Terrain
Sloped Sites: Build beds level, not parallel to the slope. Excavate the high side; build up the low side. Terrace multiple beds stepping down—each bed’s downhill wall supports the next bed’s uphill side. Ensure pathways between terraces are stable and non-slip.
Hard Surfaces (Patios, Rooftops): Skip post installation. Use bracket kits or add extra bracing. Place rigid foam insulation board under the frame to protect the surface and create a drainage gap. Add 3–4 inches of gravel inside the bottom before soil. For rooftops, verify weight limits with building management—saturated soil is heavy.
Poor Drainage Areas: Elevate bed height. Add 4 inches of gravel or crushed stone at the very bottom above hardware cloth. Avoid lining the entire interior with plastic—it can trap water.
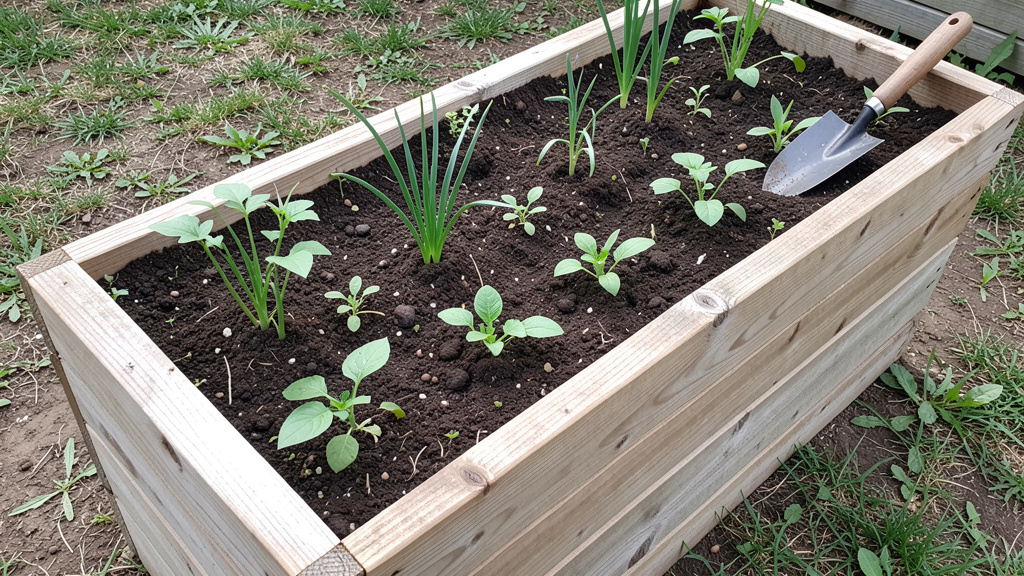
Pillar 4: Soil Science and Planting—Building Life from the Ground Up
Soil is the living engine of your garden. Filling a beautiful frame with poor soil limits potential. This pillar transforms soil from “dirt” into a dynamic, nutrient-cycling ecosystem.
The Balanced Soil Mix: Beyond Bagged Blends
Avoid generic “garden soil” bags—they can be dense, inconsistent, or heavy. Create your own optimized blend. A resilient raised bed soil typically includes three components:
– Mineral Base (Approx. 60%): Provides structure and trace minerals. Use screened topsoil (ensure loamy texture) or a commercial planting mix labeled for containers. Test: Squeeze a damp handful. It should hold shape briefly then crumble—indicating balanced texture.
– Compost (Approx. 30%): The nutrient and microbial foundation. Use well-aged (6+ months), screened compost. Blending types can help: mushroom compost (alkaline-leaning), worm castings (microbe-rich), leaf mold (water retention). Avoid fresh manure—it can harm roots and may contain pathogens.
– Aeration Amendment (Approx. 10%): Prevents compaction. Use coarse horticultural perlite or pine bark fines (¼-inch size). Avoid fine sand unless mixed carefully—it can worsen density in clay soils.
Adapting the Mix:
– For Root Crops: Slightly increase aeration amendment; use finer compost to prevent forking.
– For Acid-Lovers: Incorporate peat moss or pine fines; monitor pH periodically.
– For Arid Climates: Consider adding a small amount of soil polymer crystals to enhance water retention (use sparingly).
– For Heavy Feeders: Mix in a balanced organic granular fertilizer before filling.
Filling the Bed: Layering Strategies
Method 1: Direct Fill (Best for New Beds)
1. Place hardware cloth barrier.
2. Add 2–3 inches of coarse wood chips or straw at the bottom (optional slow-decomposition layer).
3. Fill with your custom soil mix to 1–2 inches below the frame top.
4. Water thoroughly and let settle 24–48 hours. Top up as needed.
Why it works: Immediate planting readiness; consistent texture.
Method 2: Hugelkultur-Inspired Layering (For Sustainability Focus)
1. Place hardware cloth.
2. Layer large logs/branches (decaying wood acts as a moisture reservoir).
3. Add smaller twigs, then straw/cardboard.
4. Top with 6+ inches of soil mix.
Benefits: Exceptional moisture retention; long-term fertility. Caveats: Initial nitrogen drawdown as wood decomposes—compensate with extra compost. Best for experienced gardeners or ornamental beds. Avoid in very wet climates.
Method 3: Sheet Mulching (No-Dig Conversion)
Ideal for placing beds directly over lawn:
1. Lay thick cardboard (remove tape/labels) over grass.
2. Add 3 inches of compost.
3. Top with 6+ inches of soil mix.
Science: Cardboard smothers grass; soil life incorporates layers over time. Preserves existing soil structure. Requires patience—planting ready in a few weeks as cardboard softens.
Planting Strategies: Maximizing Harmony and Yield
Square Foot Gardening Adaptation: Divide the bed into 1-foot squares using twine on stakes. Assign plants per square based on mature size:
– 1 plant: Tomato, pepper, broccoli
– 4 plants: Lettuce, spinach, bush beans
– 9 plants: Beets, carrots, onions
– 16 plants: Radishes (thinned)
Benefits: Clear spacing guidance; reduced weeds; simplified rotation. Use a template for accuracy.
Companion Planting in Confined Spaces:
– Tomatoes + Basil + Marigolds: Basil may repel certain pests; marigolds deter nematodes.
– Carrots + Onions: Onions may mask carrot scent from pests.
– Corn + Beans + Squash (“Three Sisters”): Adapt for beds—plant corn in blocks for pollination; use dwarf varieties. Beans fix nitrogen; squash shades soil.
Avoid: Planting dill near carrots (potential cross-pollination); potatoes near tomatoes (shared disease risks).
Succession Planting Calendar:
– Early Spring: Spinach, radishes, peas (harvest by late spring)
– Follow with: Bush beans, cucumbers (plant where early crops finished)
– Late Summer: Replace spent plants with kale, beets, or garlic for fall harvest
Pro Tip: Keep a simple garden journal noting planting dates and observations. Over time, you’ll develop a personalized succession map for your microclimate.
Watering Wisdom: Precision Over Guesswork
Raised beds drain faster—requiring attentive watering. Signs of underwatering: Wilting persisting at dawn; soil pulling away from edges. Signs of overwatering: Yellowing leaves; soil remains muddy long after rain.
– Best Method: Drip irrigation on a timer. Emitters at plant bases deliver water directly to roots, minimizing evaporation and foliar disease risk. Install before planting or weave through established plants.
– Budget Method: Soaker hoses snaked through the bed. Cover with mulch to reduce evaporation.
– Hand Watering: Water slowly at soil level until moisture penetrates deeply. Early morning is ideal—allows foliage to dry.
– Moisture Monitoring: Insert finger 2 inches deep. Water only if dry. A simple soil moisture meter adds accuracy.
Insight: Water needs change with plant growth. Seedlings need frequent light watering; established plants benefit from deep, infrequent soaking to encourage deep roots. Mulch with 2–3 inches of straw or shredded leaves to conserve moisture and suppress weeds.
Advanced Cultivation Systems: Elevating Your Raised Bed Ecosystem
Mastering the four pillars creates a strong foundation. Integrating these systems enhances resilience and reduces long-term effort.
Precision Irrigation Integration
Drip systems support plant health and water conservation. Design principles:
– Use pressure-regulated emitters to ensure even flow.
– Space emitters based on crop density; closer for seedlings, wider for mature plants.
– Install a filter at the water source to prevent clogging.
– Add a timer with rain sensor—automates watering while conserving resources.
– For seed starting: Use micro-sprayers on adjustable stakes for gentle surface moisture.
Upgrade Option: Moisture sensors linked to timers adjust watering based on real-time soil conditions and weather forecasts—reducing guesswork and water use.
Season Extension Architecture
Extend harvests beyond frost dates with modular covers:
– Low Tunnels: Bend PVC pipes into hoops inserted into bed edges. Cover with floating row cover (frost protection) or clear plastic (heat). Secure edges well. Ideal for spring/fall crops.
– Cold Frames: Build a hinged lid (salvaged window or polycarbonate) on the south side of the bed. Angled lid captures low winter sun. Ventilate on sunny days. Perfect for overwintering hardy greens or starting seeds early.
– Quick Hoop System: Install permanent rebar stakes at bed corners. Slide PVC pipes over stakes for instant framework. Store covers seasonally.
Critical Detail: Always include ventilation. Unventilated covers can overheat plants on sunny days. Automatic vent openers (wax-piston devices) provide hands-free temperature regulation. Cold frames can maintain soil temperatures notably above ambient air, enabling winter harvests in many zones.
Integrated Pest Management (IPM) in Confined Spaces
Raised beds simplify IPM implementation:
1. Prevention: Healthy soil supports resilient plants. Rotate crops annually. Use row covers at planting to exclude pests.
2. Monitoring: Place yellow sticky traps near susceptible crops. Check daily.
3. Biological Controls: Release beneficial insects directly into beds: ladybugs for aphids; nematodes for soil grubs. Plant nectar-rich flowers (alyssum, dill) to attract native predators.
4. Targeted Intervention: Spray insecticidal soap only on affected leaves at dusk. For slugs: beer traps sunk level with soil, or iron phosphate pellets (pet-safe).
Avoid: Broad-spectrum pesticides—they disrupt beneficial insect populations. Document pest patterns in your journal; solutions become intuitive over time.
Soil Longevity and Nutrient Cycling
Soil vitality requires renewal:
– Annual Top-Dressing: Each spring, add 1–2 inches of fresh compost across the bed surface. Earthworms and rain incorporate it naturally—no tilling required.
– Cover Cropping (Green Manure): After final fall harvest, sow crimson clover or winter rye. These fix nitrogen, suppress weeds, and protect soil over winter. Chop and drop in spring before planting. Raised bed adaptation: Use dwarf varieties to avoid overwhelming small spaces.
– Soil Testing: Every 2–3 years, test soil through your local cooperative extension. Results reveal pH shifts and nutrient needs. Adjust with targeted amendments (e.g., lime for low pH; rock phosphate for low phosphorus).
– Avoid Compaction: Never step into beds. Use a kneeling pad on pathways. Compacted soil restricts roots and water movement.
Vertical Integration: Growing Upward
Maximize yield in limited footprints:
– Trellising Systems: Install sturdy posts at bed ends. String twine vertically for peas/beans; use cattle panels bent into arches for cucumbers/squash. Train tomatoes with horizontal twine between stakes (Florida weave).
– Espalier Fruit Trees: Dwarf apple or pear trees trained flat against a bed-end trellis. Requires pruning skill but yields fruit in minimal space.
– Stackable Planters: Attach pocket planters to bed exteriors for strawberries or herbs. Ensure they don’t block airflow to the main bed.
Safety Note: Secure all vertical structures deeply into bed frames or ground—not just soil—to withstand wind and plant weight.
Navigating Challenges: Troubleshooting and Thoughtful Alternatives
Even well-built systems encounter friction. Addressing issues proactively prevents frustration. Equally important: recognizing when raised beds aren’t the optimal solution for your specific context.
Common Challenges and Practical Solutions
Soil Settling After First Season:
– Cause: Organic matter decomposition; initial air pockets collapsing.
– Solution: Top-dress with 1–2 inches of compost each spring. Avoid overfilling initially—leave 2 inches headspace. For significant settling, carefully lift plants, add soil mix beneath root balls, and replant.
– Prevention: Use well-aged compost; include stable amendments like coconut coir.
Wood Deterioration at Soil Line:
– Cause: Constant moisture exposure at ground contact.
– Solution: For minor issues, reinforce externally with metal brackets. For severe cases, replace damaged boards.
– Prevention: Use naturally rot-resistant heartwood; apply raw linseed oil to the bottom portion of boards before assembly; ensure pathways slope away from the bed to prevent water pooling.
Drainage Issues (Water Pooling):
– Cause: Compacted soil mix; insufficient aeration amendment; impermeable layer beneath bed.
– Solution: Aerate soil gently with a broadfork (avoid tilling). Mix in additional perlite or coarse material. If hardware cloth is clogged, carefully clear debris.
– Prevention: Always include adequate aeration amendment; avoid walking on soil; place beds on permeable surfaces.
Pest Intrusion (Voles, Slugs):
– Voles: Hardware cloth must extend slightly beyond bed edges underground and be buried deeply. Seal all corners.
– Slugs: Copper tape applied to dry wood may create a barrier. Diatomaceous earth sprinkled around plants (reapply after rain). Evening patrols with flashlight and soapy water.
– Prevention: Remove hiding spots near edges; encourage natural predators (toads, birds).
Nutrient Deficiencies (Yellow Leaves, Stunted Growth):
– Diagnosis: Interveinal chlorosis (yellow between veins) may indicate iron/magnesium needs; purple undersides may suggest phosphorus.
– Solution: Foliar spray with liquid kelp or fish emulsion for quick uptake. Amend soil with appropriate organic source (epsom salts for magnesium; bone meal for phosphorus).
– Prevention: Annual soil testing; consistent compost top-dressing; crop rotation.
When Raised Beds Aren’t the Optimal Solution: Respectful Alternatives
Raised beds excel in many scenarios, but honest assessment prevents wasted effort:
– Extremely Rocky or Shallow Soil Over Bedrock: Deep raised beds become costly. Consider container gardening with large fabric pots or whiskey barrels. Focus on shallow-rooted crops (lettuce, herbs).
– Severe Slope (>25% Grade): Terracing raised beds requires significant earthmoving. Sheet mulching directly on slope with deep-rooted perennials (comfrey, clover) may stabilize soil more sustainably. Consult a landscape professional.
– Very Limited Budget: Start with “lasagna gardening” directly on soil: layer cardboard, compost, straw. Plant directly into layers. Builds soil over time with minimal investment.
– Large-Scale Production (1/4+ Acre): Raised beds become labor-intensive. Consider permanent raised beds (slightly mounded beds with defined pathways) using a broadfork for aeration—retains drainage benefits with lower material costs.
– Water Restrictions in Arid Zones: While raised beds drain faster, sunken beds (depressions) may capture and retain scarce rainfall more effectively. Research traditional water-harvesting techniques like zai pits.
Ethical Considerations and Community Connection
– Water Wisdom: In drought-prone areas, prioritize drought-tolerant crops (beans, squash). Install rain barrels on downspouts to irrigate beds.
– Wildlife Support: Leave small “wild” patches between beds with native flowers to support pollinators. Avoid pesticides harmful to bees.
– Seed Saving: Preserve heirloom varieties adapted to your microclimate. Share surplus seedlings with neighbors—builds community resilience.
– Accessibility Advocacy: If designing community garden beds, include at least one wheelchair-accessible bed (30″ high, 30″ knee clearance). Partner with local organizations for inclusive input.
The Fundamental Principle: Gardening wisdom lies not in forcing a single solution, but in observing your unique context with humility and adapting strategies with intention.
Your Questions, Answered
Q: How deep should a raised bed be for tomatoes?
A: Tomatoes develop deep root systems. A minimum depth of 12 inches is acceptable, but 18–24 inches supports more robust growth, drought resilience, and higher yields. In shallower beds, select determinate (bush) varieties. Ensure the soil mix is loose and well-aerated to encourage downward root growth.
Q: Can I use soil from my yard to fill raised beds?
A: Generally not recommended. Native soil is often too dense, sandy, or may contain weed seeds and pathogens. If your soil tests well (loamy texture, neutral pH, clean history), you can blend it as part of your mix: up to 30% native soil combined with 50% compost and 20% aeration amendment. Always test soil first through your local extension service.
Q: Do raised beds need to be replaced eventually?
A: Lifespan varies significantly by material. Untreated pine may last 3–7 years; cedar 15–25+; stone or concrete block can endure for generations. Signs it’s time to rebuild: significant structural compromise, leaning frames, or hardware failure. Planning for longevity upfront—choosing durable materials—reduces long-term effort and waste. Repurpose old wood for compost bins or pathway edging when possible.
Q: How do I keep cats or dogs out of my raised beds?
A: Physical barriers work best. Stretch flexible bird netting just above soil level (secured to stakes) until plants are established—pets avoid walking on it. For persistent diggers, lay chicken wire flat on soil surface before mulching (cut holes for plants); it’s uncomfortable for paws but becomes invisible. Motion-activated sprinklers deter larger animals. Avoid cocoa bean mulch—it’s toxic to dogs.
Q: Is it safe to grow food in raised beds made with pressure-treated wood?
A: Modern pressure-treated wood (post-2004, labeled ACQ or CA) is approved for vegetable gardens by regulatory agencies. However, some gardeners prefer caution. For peace of mind—especially in organic gardens or children’s gardens—line the interior with heavy-duty landscape fabric. This creates a barrier while allowing moisture exchange. Never use pre-2004 CCA-treated wood.
Q: Why are my plants wilting even when soil is moist?
A: This often indicates root issues from poor drainage or compaction. Check: Is your mix too heavy on compost without enough aeration amendment? Is hardware cloth clogged? Has soil settled significantly? Solution: Gently inspect roots (brown/mushy suggests rot). Improve drainage by adding perlite; aerate soil with a broadfork; ensure the bed isn’t in a low spot collecting water. Overwatering in cool weather can also cause this—water only when the top 1–2 inches feel dry.
Q: Can I build a raised bed directly on concrete or asphalt?
A: Yes, with modifications. Place rigid foam insulation board (XPS, 2 inches thick) under the frame to protect the surface and create a drainage gap. Add 3–4 inches of gravel at the very bottom inside the bed before soil. Ensure the bed is at least 18 inches deep for adequate root space. Monitor soil temperature in full sun—light-colored mulch helps cool roots.
Q: How do I rotate crops in a small raised bed?
A: Even in one bed, rotation matters. Divide mentally into quadrants. Year 1: Tomatoes (heavy feeder) in quadrant A; beans (nitrogen-fixer) in B; carrots (light feeder) in C; lettuce in D. Year 2: Shift crops to new quadrants. Keep a simple journal sketch. If space is extremely limited, focus on soil renewal: after heavy feeders, plant a cover crop like clover over winter, or add extra compost before replanting.
Q: What’s a cost-effective way to fill a large raised bed?
A: Use a “Hugelkultur-lite” approach: Fill the bottom third with free materials like fallen branches, straw, or cardboard boxes (remove tape). Top with your custom soil mix. The decomposing base retains moisture and adds nutrients over time. Source compost from municipal programs (often low-cost); screen it yourself. Partner with neighbors to buy soil/compost in bulk.
Q: Do raised beds attract more pests than in-ground gardens?
A: Not inherently—but concentrated plantings can make pests more noticeable. However, raised beds offer significant pest advantages: elevation deters slugs; defined borders simplify barrier installation; starting with clean soil gives plants a healthier foundation. Vigilant monitoring (daily quick scans) catches issues early. Healthy soil grown in raised beds produces stronger plants naturally more resilient to pest pressure.
Q: How do I prepare raised beds for winter?
A: After harvest, remove diseased plant debris (compost healthy material). Plant a cover crop like winter rye or crimson clover to protect soil. Alternatively, spread 2–3 inches of shredded leaves or straw as mulch. In harsh climates, wrap wood beds with burlap to reduce weather stress. Remove trellises for storage. This “winter armor” preserves soil structure and fertility for spring.
Q: Can raised beds be moved if I relocate?
A: Portable designs exist. Use metal bracket kits (no ground posts) or build frames with removable fasteners. Line interior with landscape fabric to hold soil during transport. Note: Moving soil is heavy—plan to refill at the new location. Document your design with photos for reassembly. For permanent beds, take cuttings or save seeds of favorite plants to carry forward.
Conclusion and Your Path Forward
Raised bed gardening is far more than a construction project—it’s a commitment to working with natural systems. By elevating your garden, you gain greater influence over soil health, extend growing seasons, reduce physical strain, and create a space where ecology and intention intersect. The four pillars we’ve explored—strategic advantages, material mastery, structural integrity, and soil science—form an interdependent foundation. Mastery of one amplifies the others. Remember the core truth revealed throughout this guide: the most successful gardens aren’t built on perfection, but on thoughtful observation and adaptive care. Your soil will teach you; your plants will signal their needs; each season deepens your understanding.
Recap: Three Foundational Principles
1. Soil is Sacred: Invest time in crafting and maintaining a living soil ecosystem. No amendment compensates for poor soil biology.
2. Structure Serves Function: Every design choice—from bed height to material selection—should solve a specific challenge in your context. Avoid copying designs that don’t address your constraints.
3. Observe Relentlessly: Spend five quiet minutes daily in your garden. Notice leaf color, soil moisture, insect activity. This builds intuitive wisdom no guidebook can replace.
The 24-Hour Rule: Your Immediate Next Step
Within the next 24 hours, take one concrete action that moves you from intention to reality:
– If you’re planning: Sketch your ideal bed layout. Note sun patterns in your yard between 9 AM and 3 PM today.
– If you’ve built but not filled: Contact two local suppliers for soil/compost options.
– If your bed is planted: Place a small notebook in a weatherproof bag near your garden. Make your first observation entry tonight.
This tiny action creates momentum. Progress compounds through consistent, small steps—not grand, infrequent gestures.
The Bigger Picture: Your Garden as Connection
Every seed planted, every soil amendment added, every pest managed with care contributes to something larger. You’re nurturing topsoil—one of Earth’s most precious resources. You’re creating habitat for pollinators in an increasingly fragmented landscape. You’re growing nutrient-dense food that nourishes your body. You’re modeling stewardship for children, neighbors, and future generations. In a world of haste, your raised bed stands as a quiet testament to patience, reciprocity, and hope. It is both sanctuary and classroom—a place where connection to the earth is renewed daily. Tend it with respect, learn from its rhythms, and share its abundance generously. The garden you cultivate today becomes part of a living legacy.
Explore Our Complete Garden Mastery System:
Building a No-Dig Garden: Sheet Mulching Techniques for Instant Beds | Organic Pest Control Handbook: Attract Beneficial Insects, Not Chemicals | Season Extension Mastery: Cold Frames, Hoops, and Row Covers Demystified | Soil Testing Decoded: From Sample to Actionable Amendments | Water-Wise Gardening: Drip Irrigation Setup and Rainwater Harvesting | Small Space Harvests: Vertical Gardening Systems for Patios and Balconies | Seed Starting Success: From Germination to Hardening Off