Go beyond quick fixes. Learn a holistic system that protects your plants, your home, and your loved ones—without harsh chemicals.
Indoor plant pests don’t have to mean disaster. This comprehensive guide reveals a step-by-step integrated pest management (IPM) system designed specifically for houseplant enthusiasts who prioritize safety and sustainability. Discover how to identify invaders early, deploy targeted non-toxic treatments, and cultivate an environment where plants thrive while pests struggle to gain a foothold—all while keeping your living space free of harmful residues. Whether you’re nurturing a single peace lily or managing a diverse collection, this framework transforms pest challenges into opportunities for deeper plant understanding and proactive care.
Introduction
Walking into a room filled with lush greenery should bring calm, not concern. Yet for many plant caregivers, the discovery of tiny insects, sticky residue, or yellowing leaves triggers immediate anxiety. Conventional advice often pushes chemical sprays as the fastest solution—but what happens when you have curious toddlers nearby? Or a cat who naps beneath your fiddle-leaf fig? What if the “solution” damages delicate foliage or fails to address underlying conditions, leading to recurring issues? These very real dilemmas reveal a critical gap in most pest guidance: the absence of a truly integrated, safety-first methodology tailored to indoor ecosystems.
This guide introduces the Plant Guardian Framework, a refined adaptation of integrated pest management principles specifically engineered for the unique constraints and opportunities of indoor plant care. Unlike fragmented tips scattered across the internet, this system operates on a foundational insight supported by horticultural practice worldwide: sustainable pest management begins not with elimination, but with understanding. By harmonizing prevention, precise identification, targeted intervention, and environmental stewardship, you cultivate resilience in your plants while safeguarding your home’s well-being. This approach reflects methodologies used in settings where chemical use is intentionally minimized—demonstrating that thoughtful care and plant health are deeply interconnected.
The Plant Guardian Framework: Your Five-Step System for Sustainable Pest Management
Imagine pest management not as a battle to be won, but as a rhythm to be learned—a series of thoughtful observations and gentle corrections that keep your indoor garden in balance. The Plant Guardian Framework transforms overwhelming challenges into manageable steps. This isn’t about perfection; it’s about progression. Each phase builds upon the last, creating a feedback loop where knowledge compounds with every plant you nurture. Developed through synthesis of established horticultural principles and refined for the home environment, this system empowers you to respond with clarity rather than concern when challenges arise.
Step 1: Prevention as the First Line of Defense
Prevention forms the most reliable foundation of indoor pest management. In controlled indoor environments, many pest occurrences trace back to preventable entry points or cultural conditions. Think of prevention as installing thoughtful safeguards around your plant collection before challenges appear.
Quarantine Protocol: The Observation Period
Every new plant entering your home—whether purchased, gifted, or propagated—benefits from a dedicated isolation period. Place it in a separate area away from your established collection for approximately three weeks. Why this duration? It allows time for hidden pests with typical indoor lifecycles to become visible. During this period:
– Inspect daily under good light, paying special attention to leaf undersides, stem joints, and soil surface
– Gently wipe leaves with a damp cloth to remove dust and potential hitchhikers
– Maintain appropriate watering to avoid stress that may attract moisture-loving pests
– Common consideration: Skipping quarantine because “the plant looks healthy” carries risk. Some pests like scale insects or root mealybugs remain nearly invisible during early stages. Isolating new additions protects your entire collection.
Soil and Pot Hygiene
The growing medium can introduce unwanted organisms. Always use fresh, pasteurized potting mix—not garden soil, which may contain pathogens or insect eggs. When repotting:
– Clean pots thoroughly: Wash ceramic or plastic containers with soapy water and rinse well. For porous terra cotta, consider baking at a moderate temperature if the pot is oven-safe and your equipment allows precise control.
– Replace all soil during repotting rather than adding new mix atop old soil. This disrupts potential hidden life cycles.
– Nuance: Healthy soil contains beneficial microbial life. If preserving soil biology is important for sensitive plants, solarization offers an alternative: Moisten potting mix, place in a sealed black plastic bag, and position in a warm location for several weeks. Sustained warmth can reduce pest presence while retaining some microbial diversity.
Environmental Optimization
Plants under stress become more vulnerable. Strengthen natural resilience by aligning care with each plant’s needs:
– Air Circulation: Gentle airflow discourages fungal growth and pest colonization. A small fan on low setting nearby (not directly on plants) mimics natural breezes. In humid environments, this helps reduce conditions favorable for certain pests.
– Watering Wisdom: Overwatering is a frequent contributor to vulnerability. Fungus gnats thrive in consistently moist soil; root issues weaken plants. Use the finger test: Insert your index finger to the second knuckle. Water only when the top layer feels dry. For moisture-sensitive plants like African violets, bottom-watering keeps foliage dry.
– Light Matching: A plant placed far from its ideal light conditions experiences stress. Research each species’ preferences—desert succulents typically need bright light; forest-floor plants like peace lilies prefer medium indirect light. Healthy, unstressed plants maintain stronger natural defenses.
– Illustrative insight: Adjusting a plant’s position to better match its light needs has, in many observed cases, reduced recurring pest pressure without additional intervention—highlighting how environmental alignment addresses underlying conditions.
Barrier Methods
Create simple physical deterrents:
– Apply a thin layer of coarse sand, fine gravel, or decorative pebbles on top of potting soil. This discourages adult fungus gnats from laying eggs in moist soil.
– For plants prone to crawling pests, wrap the pot’s exterior with double-sided sticky tape. Insects attempting to climb become trapped. Replace tape weekly.
– Accessible alternative: Copper tape along pot rims may deter certain soft-bodied pests due to a mild reaction upon contact—a technique adapted from organic gardening practices.
Step 2: Vigilant Monitoring and Early Detection
Early detection transforms a potential challenge into a minor adjustment. Waiting until visible damage appears often means pests have already reproduced significantly. Implement a consistent observation routine that becomes as habitual as watering.
The Weekly Wellness Scan
Set a recurring reminder for a brief “Plant Check-Up.” During this 10–15 minute session:
1. Soil Surface Inspection: Look for tiny flies, white specks, or unusual textures. Gently disturb the top layer with a chopstick to check beneath.
2. Stem Examination: Run fingertips lightly along stems. Sticky residue (honeydew) suggests sap-sucking activity. Bumpy textures may indicate scale.
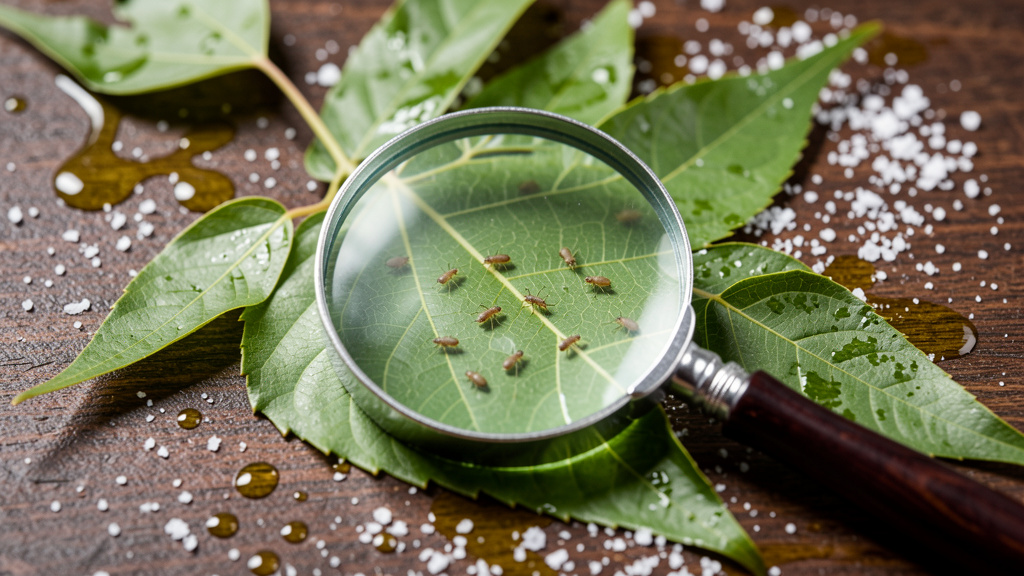
3. Leaf Underside Audit: Hold leaves up to light or use a magnifying glass. Check for webbing, tiny moving dots, or stippling (discolored pinpricks).
4. Growth Tip Assessment: New growth is particularly attractive to many pests. Inspect emerging leaves and buds closely.
5. Trap Monitoring: If using yellow sticky cards, note changes in trapped insects. A noticeable increase signals active activity.
Why this matters: Detecting pests when populations are still low significantly increases the effectiveness of gentle, non-chemical methods. Waiting until damage is severe reduces treatment options and increases plant stress.
Diagnostic Tools for the Home Gardener
You don’t need a laboratory—just thoughtful tools:
– Magnification: A 10x–15x magnifying glass reveals details invisible to the naked eye. Spider mites appear as tiny moving specks; thrips look like slender threads.
– White Paper Test: Hold white paper beneath suspect leaves and tap sharply. Dislodged pests become visible against the contrasting background.
– Moisture Awareness: Prevent overwatering—a key factor in vulnerability. Insert a moisture meter probe to root depth; water only when appropriate for your plant type.
– Simple Journaling: Note observations: “March 12: Noticed small flies near soil surface. Placed sticky card.” Tracking patterns reveals tendencies or recurring spots.
Helpful reminder: Sticky residue on leaves is sometimes mistaken for natural plant processes. Early investigation helps distinguish between harmless phenomena and signs requiring attention.
Step 3: Accurate Identification: Know Your Adversary
Misidentification commonly leads to ineffective responses. Treating for aphids when dealing with spider mites wastes effort and allows the actual issue to progress. Precise identification directs your actions with purpose.
The Identification Flowchart Method
Answer these questions sequentially:
1. Where is the activity?
– New growth distorted/yellowed: Aphids, thrips, or mites
– Stems with bumps: Scale insects
– Webbing between leaves: Spider mites
– Soil surface with tiny flies: Fungus gnats
– Cottony masses in leaf joints: Mealybugs
- What does it look like? (Use magnification)
- Pear-shaped, soft-bodied: Aphids
- Tiny moving dots: Spider mites
- White fuzzy masses: Mealybugs
- Hard or waxy bumps: Scale
-
Translucent larvae in soil: Fungus gnat larvae
-
What residue is present?
- Sticky honeydew: Aphids, scale, mealybugs, whiteflies
- Fine webbing: Spider mites
- Black sooty mold: Secondary growth on honeydew
- Silvery streaks: Thrips feeding damage
Understanding Common Indoor Plant Pests
Knowing pest characteristics informs thoughtful timing of responses.
Aphids
– Appearance: Soft-bodied, pear-shaped insects. Colors vary: green, black, brown. Often cluster on new growth.
– Signs: Curled/yellowing leaves, sticky honeydew, sooty mold.
– Insight: Aphids reproduce rapidly under favorable conditions. Females can produce multiple generations quickly. Swift, targeted action is often beneficial.
– Identification note: Aphids move readily when touched; scale insects typically remain fixed.
Spider Mites
– Appearance: Extremely small arachnids (eight legs). Colors range from red to green/brown.
– Signs: Fine webbing (especially under leaves), stippling (tiny yellow/white dots), bronzing of leaves. Tap leaf over white paper to see moving specks.
– Insight: Thrive in warm, dry conditions. Webbing protects colonies. Humidity management is often part of an effective response.
– Key detail: Webbing presence helps distinguish spider mites from other tiny pests.
Mealybugs
– Appearance: Soft-bodied insects covered in white, waxy filaments. Often hide in leaf axils or stem joints.
– Signs: White fluffy masses, sticky honeydew, sooty mold. Root mealybugs may cause wilting despite moist soil.
– Insight: Nymphs (“crawlers”) are mobile briefly before settling. Targeting during this phase can improve effectiveness.
– Note: Some varieties have subtle differences in reproduction; consistent monitoring matters.
Scale Insects
– Appearance: Two main types:
– Soft scale: Brown, tan, or beige domes. Produce honeydew.
– Armored scale: Hard, shell-like cover. Do not produce honeydew; more challenging to address.
– Signs: Bumpy growths on stems/leaves, yellowing foliage, sticky residue (soft scale).
– Insight: Crawlers emerge periodically. Timing interventions to this mobile stage is often more effective than treating settled adults.
– Identification tip: Soft scale feels waxy; armored scale feels hard.
Fungus Gnats
– Appearance: Adults resemble tiny mosquitoes. Larvae are translucent with dark heads, living in soil.
– Signs: Adults hovering near soil; larvae may affect roots causing poor growth. Often confused with fruit flies.
– Insight: Eggs hatch quickly. Larvae feed before pupating. Overwatering accelerates their lifecycle.
– Key distinction: Fungus gnats are weak fliers—they tend to run across soil when disturbed. Fruit flies hover persistently around fermenting matter.
Whiteflies
– Appearance: Tiny, moth-like insects with white wings. Cluster on leaf undersides.
– Signs: Cloud of white insects when plant is disturbed, sticky honeydew, yellowing leaves.
– Insight: Nymphs are flat and immobile—making them vulnerable to contact methods. Adults are mobile and reproduce readily.
– Monitoring tip: Yellow sticky cards help track and reduce adult numbers.
Thrips
– Appearance: Slender, dark insects with fringed wings. Move quickly when disturbed.
– Signs: Silvery streaks or speckling on leaves, deformed new growth, black specks (frass).
– Insight: Females lay eggs inside leaf tissue. Nymphs feed before dropping to soil to pupate.
– Detection aid: The white paper tap test is especially helpful for confirmation.
Springtails
– Appearance: Tiny, wingless, jump when disturbed. Colors: white, gray, blue.
– Signs: Swarming on soil surface after watering. Generally harmless—they feed on decaying matter.
– When to note: Large populations may indicate overly moist soil or decomposing material. Rarely damage healthy plants but can affect tender seedlings.
– Reassurance: Unlike fungus gnats, springtails are typically beneficial decomposers. Intervention is usually unnecessary unless numbers are excessive.
The Fundamental Principle: “Accurate identification guides every subsequent action—a concept consistently emphasized in horticultural resources. Misdirected efforts consume time and resources while allowing the actual issue to progress.”
Step 4: Intervention: Choosing the Right Tool for the Situation
With identification complete, select responses matching the pest’s characteristics, your plant’s sensitivity, and your household’s needs. Prioritize methods causing minimal disruption to plant health and home environment. Apply treatments in this thoughtful order: mechanical → biological → least-toxic sprays → targeted organic products. This “escalation ladder” supports effectiveness while honoring safety.
Mechanical and Physical Controls: Immediate Action
Direct, non-chemical methods that remove pests physically:
– Water Rinse: For sturdy plants (ficus, schefflera), use a strong lukewarm water stream in the sink or shower to dislodge pests from leaf undersides and stems. Repeat every few days for a couple of weeks to disrupt lifecycles. Caution: Avoid on fuzzy-leaved plants (African violets, calatheas) or delicate ferns—water pressure may damage foliage.
– Hand Removal:
– Mealybugs/Scale: Dip a cotton swab in diluted isopropyl alcohol (70%). Gently dab visible pests. Wipe area with a clean damp cloth afterward. For heavier presence, a soft toothbrush dipped in solution may help.
– Larger Insects: Remove manually and place in soapy water.
– Pruning: Sterilize tools between cuts. Remove heavily affected leaves or stems. Seal clippings in a bag before discarding. For scale on woody stems, carefully scrape off with a fingernail or soft brush.
– Soil Management: For fungus gnats: Allow the top layer of soil to dry thoroughly between waterings. In persistent cases, gently remove the plant, rinse roots under lukewarm water, and repot in fresh sterile mix.
– Practical tip: Perform mechanical treatments in an easy-to-clean area like a bathtub. Lay down newspaper for simple cleanup.
Biological Controls: Nature’s Helpers
Introduce beneficial organisms that target specific pests—effective in contained indoor spaces when applied thoughtfully:
– Predatory Mites (Neoseiulus californicus, Phytoseiulus persimilis):
– Targets: Spider mites
– Application: Release directly onto affected leaves in the evening. P. persimilis is often used for active outbreaks; N. californicus may suit prevention or low-level presence.
– Conditions: Benefits from moderate humidity. Lightly mist leaves before release if air is dry. Avoid recent use of broad-spectrum treatments.
– Sourcing: Order from reputable biological control suppliers. Follow included instructions carefully.
– Ladybug Larvae:
– Targets: Aphids, mealybugs, scale crawlers
– Note: Larvae (alligator-shaped, black with orange spots) are often more effective indoors than adults, as they cannot fly and remain on the plant.
– Application: Release at the base of the plant in the evening. Lightly mist foliage for moisture. Keep windows closed temporarily.
– Beneficial Nematodes (Steinernema feltiae):
– Targets: Fungus gnat larvae, thrips pupae in soil
– Application: Mix powder with lukewarm water per package directions. Water thoroughly into soil. Apply in the evening when soil is moist. Keep soil lightly damp for about a week afterward. Refrigerate unused product; use within the recommended timeframe.
– Green Lacewing Larvae (“Aphid Lions”):
– Targets: Aphids, thrips, mite eggs, small caterpillars
– Advantage: Larvae are active predators; less likely to disperse than adults.
– Application: Sprinkle carrier material containing larvae directly onto affected areas. Best suited for enclosed spaces like plant cabinets.
Why biologicals can work well: Unlike sprays requiring direct contact, beneficial organisms actively seek pests in hidden areas. They provide ongoing monitoring as long as prey is present, then naturally diminish.
Least-Toxic Sprays and Solutions
When mechanical methods need support, these targeted options minimize impact. Always test on a small leaf section first; wait 48 hours to check for sensitivity. Apply in early morning or evening to avoid potential leaf stress from wet foliage in strong light.
Diluted Isopropyl Alcohol Solution:
– Best for: Mealybugs, scale, aphids on non-fuzzy plants
– Preparation: Mix 1 part 70% isopropyl alcohol with 1 part water. For sensitive plants, dilute further (1:3 ratio).
– Application: Use a cotton swab for spot treatment. For light presence, lightly spray affected areas (avoid saturating soil). Alcohol disrupts pest coatings.
– Note: Higher concentrations evaporate too quickly for optimal contact. 70% allows sufficient dwell time.
– Safety: Use in a ventilated area. Keep away from open flames. Avoid on cacti/succulents with thick protective coatings—alcohol may cause spotting.
Neem Oil Emulsion:
– Best for: Aphids, spider mites, whiteflies, thrips
– Background: Contains compounds that may disrupt insect feeding and development. Also has mild antifungal properties.
– Preparation:
1. Mix 1 tsp cold-pressed neem oil + ½ tsp mild liquid soap (like pure Castile soap) in 1 quart (1 liter) warm water.
2. Shake vigorously until emulsified (milky appearance).
3. Use promptly—freshly mixed solution is most effective.
– Application: Spray thoroughly on leaf undersides, stems, and soil surface. Repeat every 5–7 days for a few weeks to address multiple lifecycle stages.
– Important detail: “Cold-pressed” neem oil retains active compounds; clarified hydrophobic neem oil (often sold for cosmetics) lacks pest-management properties. Check the label.
– Safety: Avoid spraying in high heat or on plants in direct sun. Keep pets away during application; safe once dry. Not recommended for plants in bloom if later moved outdoors.
Insecticidal Soap:
– Best for: Soft-bodied pests (aphids, spider mites, whiteflies, young scale)
– How it works: Potassium salts penetrate insect coatings. Biodegrades rapidly.
– Preparation: 1 tbsp pure liquid soap (no detergents, degreasers, or additives) + 1 quart water. Pure Castile soap is often suitable.
– Application: Spray directly on pests until lightly coated. Must contact pests to be effective—ineffective once dry. Reapply after heavy watering.
– Plant sensitivity: Test first. Some plants like ferns, gardenias, or certain orchids may show sensitivity.
– Why homemade: Allows control over ingredients, avoiding unnecessary additives.
Horticultural Oil (Refined):
– Best for: Scale, mites, aphids—especially on woody plants (citrus, ficus)
– Mechanism: Forms a barrier that affects immobile stages.
– Preparation: 2.5 tbsp horticultural oil + ½ tsp soap + 1 quart water. Shake well.
– Application: Spray thoroughly at dusk. Avoid temperature extremes or drought-stressed plants.
– Note: “Dormant oil” is heavier—use only on deciduous plants during leafless periods. “Summer oil” is refined for use on foliage.
Chamomile Tea Spray (Supportive Care):
– Best for: Gentle foliar support after pest activity
– Preparation: Steep 2 chamomile tea bags in 1 cup boiling water for 15 minutes. Cool completely. Strain. Dilute with 1 quart water.
– Application: Lightly mist foliage. Contains compounds with mild soothing properties. Also supports plant calm after disturbance.
Considering Commercial Organic Products
For persistent situations or convenience, EPA-registered organic options offer consistency:
– Azadirachtin-based products: Standardized neem extracts. Follow label instructions carefully.
– Pre-mixed insecticidal soaps: pH-balanced formulas may reduce phytotoxicity risk.
– Beneficial insect kits: Contain multiple predator species for complex situations.
– Bti products (Bacillus thuringiensis israelensis):
– Targets: Fungus gnat larvae exclusively
– Application: Sprinkle granules on soil surface; water in. Bti affects only specific larval stages. Harmless to pets, earthworms, and beneficial organisms.
– How it works: Larvae ingest Bti, which affects their digestive system. Adults are unaffected—but without new larvae maturing, populations decline over weeks.
– Preventive use: Helpful during seasons when overwatering risk increases (e.g., winter with indoor heating).
Universal safety practice for all treatments:
1. Remove pets and children from the area during application
2. Wear gloves
3. Apply in a well-ventilated space (bathroom with fan, near an open window, or outdoors)
4. Never spray near food preparation surfaces
5. Store concentrates securely away from children and pets
6. Rinse application tools thoroughly after use
Step 5: Evaluation and Adaptation: Learning from Each Experience
Intervention is not an endpoint—it’s part of an ongoing cycle of observation and refinement. Systematic evaluation prevents recurrence and builds your confidence.
The Follow-Up Observation Protocol
After initial treatment:
– Day 1: Note pest locations, plant condition, treatment applied
– Day 3: Check for changes in pest activity. Note any plant response (leaf curl, discoloration)
– Day 7: Re-inspect thoroughly. Are new signs appearing? Is the plant recovering?
– Decision points:
– Improvement: Continue scheduled treatments. Monitor closely for several weeks.
– No change: Re-evaluate identification. Was coverage complete? Consider adjusting method or timing.
– Worsening: Isolate the plant. Reassess overall plant health—severe issues may indicate underlying stress (root conditions, light mismatch).
Post-Activity Soil and Pot Care
After resolving an issue:
– Refresh the top layer of soil to remove residual material
– Clean pot exterior with soapy water
– For persistent soil concerns, solarize soil: Moisten mix, seal in a black plastic bag, and place in a warm location for several weeks
– Preventive consideration: A light dusting of food-grade diatomaceous earth (DE) on the soil surface may deter soft-bodied larvae. Caution: Use only food-grade DE; wear a mask when applying to avoid inhalation. Reapply after watering.
Integrating Insights
Add observations to a simple plant journal:
– “Fungus gnats appeared after using non-sterile mix during repotting”
– “Spider mite activity increased when humidifier was off during winter”
– “Alcohol swabbing resolved mealybug presence on orchid within days”
Over time, patterns emerge—revealing your home’s unique conditions and your most reliable responses. This personalized knowledge becomes increasingly valuable.
Special Considerations: Pets, Children, and Sensitive Plants
Safety informs every choice. Tailor your approach to your household’s unique needs.
Pet-Safe Practices
– Cats and Dogs:
– Neem oil: Low mammalian toxicity but ingestion may cause stomach upset. Apply when pets are out of the room; allow several hours to dry before re-entry. Store concentrates securely.
– Essential oils: Many (tea tree, citrus, peppermint) pose risks to cats. Avoid entirely in plant care routines near pets.
– Diatomaceous earth: Food-grade is generally safe once settled, but airborne particles may irritate. Apply when pets are absent; allow time to settle.
– Generally well-tolerated: Insecticidal soap (once dry), Bti products, mechanical removal.
– Resource: Consult veterinary resources like the ASPCA Animal Poison Control Center for guidance on specific products.
– Birds and Reptiles:
– Highly sensitive to airborne particles. Perform all treatments in a separate, well-ventilated area. Wait 24 hours before returning the plant to shared spaces.
– Mechanical methods (water rinse, alcohol swabs) are often the gentlest choice.
Child-Safe Practices
– Store all concentrates, alcohol, and tools in a locked cabinet
– Use child-resistant spray bottles if available
– Teach children gentle plant interaction: “Plants are for observing with care.” Use small “Observing” tags on plants during treatment periods
– Prioritize non-toxic methods (beneficial insects, insecticidal soap) for plants within easy reach
– Involve children positively: “Let’s check how our helpful ladybug larvae are doing today!”
Sensitive Plant Adaptations
– Fuzzy-Leaved Plants (African Violets, Gloxinias):
– Avoid spraying directly—water spots may cause lasting marks.
– Use alcohol-dipped cotton swabs for spot treatment.
– For mites: Pour lukewarm water gently over soil only in the sink. Wipe leaves with a soft dry brush.
– Increase ambient humidity with a pebble tray (plant sits above water level) to discourage spider mites.
– Orchids:
– Scale and mealybugs often hide in sheaths.
– Soak the pot in lukewarm water for 10–15 minutes to encourage pests to surface; repeat weekly if needed.
– Use cotton swabs with alcohol for visible pests. Avoid oil-based sprays on delicate flowers.
– Ferns and Calatheas:
– Highly sensitive to soap/oil sprays.
– Primary defense: Humidity management (40–60% ideal). Use a humidifier if needed.
– For pests: Gentle water rinse in the shower; isolate immediately if affected.
– Succulents and Cacti:
– Mealybugs nest in crevices. Use a toothpick dipped in alcohol for precision removal.
– Avoid wetting fuzzy or powdery coatings (farina)—causes permanent scarring.
– Soil drench with diluted neem oil may target root pests. Test first.
Allergy and Chemical Sensitivity Considerations
– Prioritize mechanical removal and biological controls
– Perform treatments outdoors or in a garage when possible
– Use an air purifier with HEPA filter in the plant area during treatment days
– Choose fragrance-free soaps for DIY sprays
– Wear a mask when applying dry amendments like diatomaceous earth
Navigating Common Challenges: Understanding Setbacks and Adapting
Even with careful technique, challenges occur. Understanding why builds resilience and prevents discouragement.
“I applied treatment multiple times and pests remain!”
– Possible factors:
1. Incomplete coverage: Pests hiding in leaf joints, stem crevices, or soil escaped contact. Solution: Use cotton swabs dipped in solution to reach hidden areas.
2. Identification uncertainty: The treatment may not match the actual pest. Solution: Re-identify using the white paper test or magnification.
3. Solution freshness: Homemade sprays like neem emulsion lose effectiveness quickly. Solution: Mix a fresh batch for each application.
4. Lifecycle timing: Treatments often target active stages; eggs may hatch later. Solution: Repeat treatment at appropriate intervals to address emerging stages.
– Adaptation: Combine methods thoughtfully. For example, a gentle spray followed by introducing beneficial predators can address multiple lifecycle stages.
“My plant keeps experiencing recurring issues!”
– Underlying factors:
– Nearby sources: Other plants may harbor unnoticed activity. Solution: Inspect your entire collection; isolate affected plants promptly.
– Environmental conditions: Overwatering (fungus gnats), low humidity (spider mites), or poor air movement. Solution: Address cultural conditions first—treatments alone rarely resolve recurring issues without this step.
– Reintroduction pathways: Pests may return via clothing, open windows, or new plants. Solution: Use yellow sticky cards near windows; inspect new additions thoroughly.
– Systemic approach: Group plants by water needs and vulnerability. Position higher-risk plants (citrus, ficus) away from sensitive collections during monitoring periods.
“The treatment seemed to stress my plant!”
– Common scenarios:
– Leaf discoloration after spraying: Applied in direct sun or high heat. Solution: Treat during cooler parts of the day; rinse leaves gently with clean water if irritation appears.
– Wilting after soil treatment: Overwatering during application. Solution: Water soil lightly before applying solution; ensure pots have drainage.
– Slow recovery after repeated handling: Plant stressed by frequent intervention. Solution: Space treatments appropriately; focus on prevention between sessions.
– Recovery support: Move plant to bright, indirect light. Water only when soil is appropriately dry. Apply diluted seaweed extract (follow product instructions) to foliage weekly—contains compounds that may support plant recovery. Be patient; healing takes time.
“I can’t see pests but damage is progressing!”
– Possible stealth factors:
– Thrips: Very small; damage often appears before pests are easily visible. Solution: White paper tap test + yellow sticky cards.
– Root feeders: Activity below soil line; plant shows general decline. Solution: Gently remove plant, rinse roots, inspect for pests. Repot in fresh soil if needed.
– Microscopic mites: Distort new growth. Solution: Prune affected growth; isolate plant. Consult local extension resources for identification support.
– Diagnostic aid: Take a close-up photo with your smartphone. Zoom digitally. Share with plant identification communities online for additional perspectives.
When Compassionate Release is Appropriate
Despite dedicated efforts, some situations warrant removing a plant:
– Plant is severely weakened (extensive bare stems, root compromise)
– Pest is highly contagious and difficult to contain
– Treatment requirements consistently outweigh the plant’s role in your space
– Humane removal: Seal the entire plant (pot and all) in a heavy-duty plastic bag. Place in freezer for 72 hours. This ensures all life stages are addressed without releasing organisms. Discard bag in outdoor trash.
– Perspective: Releasing a plant is not failure—it is responsible stewardship protecting your entire collection. Honor the care you provided; carry forward the lessons learned.
Seasonal Awareness: Adapting Your Approach Through the Year
Pest pressure shifts with seasons and indoor conditions. Proactive adjustments prevent predictable challenges.
Winter (Lower Light, Dry Indoor Air)
– Common concerns: Spider mites (thrive in dry heat), scale insects
– Preventive focus:
– Increase ambient humidity: Group plants, use pebble trays, run a humidifier near collections
– Adjust watering frequency—shorter days slow growth and water uptake
– Wipe leaves gently with a damp cloth monthly to remove dust where pests may hide
– Inspect seasonal plants thoroughly before bringing indoors
Spring (Increasing Light, Active Growth)
– Common concerns: Aphids, thrips, whiteflies (attracted to tender new growth)
– Preventive focus:
– Begin consistent monitoring as growth accelerates
– Provide light fertilization to support robust growth (vigorous plants resist pests better)
– Open windows cautiously—install fine mesh screens to block flying pests
– Repot root-bound plants before the main growth surge begins
– Opportunity: Favorable temperatures and light support beneficial insect activity if introduced.
Summer (Heat, Humidity Variations)
– Common concerns: Fungus gnats (if overwatered), mealybugs
– Preventive focus:
– Water early morning to allow soil surface to dry before evening
– Ensure good air movement—use fans on low setting
– Avoid wetting foliage in high humidity (may encourage fungal issues)
– Move sensitive plants away from intense afternoon sun (heat stress weakens defenses)
– Caution: Neem oil may cause leaf stress in high heat. Apply only during cooler morning hours.
Fall (Cooling Temperatures, Shorter Days)
– Common concerns: Scale insects, residual soil pests
– Preventive focus:
– Bring outdoor plants inside before nighttime temperatures drop significantly—inspect thoroughly first
– Reduce fertilizing as growth naturally slows
– Clean windowsills and plant stands—remove potential hiding spots
– Apply preventive Bti to soil of plants historically prone to gnats
– Transition tip: Gradually acclimate outdoor plants to lower indoor light over a week to minimize stress.
Your Questions, Answered
Q: Is neem oil safe around cats?
A: While cold-pressed neem oil has low mammalian toxicity, ingestion may cause gastrointestinal upset in cats. For safety: Apply neem solutions when cats are out of the room; allow 2–3 hours for complete drying before re-entry. Store concentrates securely. In households with high pet access, prioritize mechanical removal or insecticidal soap (harmless once dry). Consult your veterinarian about specific household considerations.
Q: How do I tell fungus gnats from fruit flies?
A: Fungus gnats have slender dark bodies, long legs, and gray wings; they run across soil when disturbed and are weak fliers. Fruit flies have tan bodies, often red eyes, and hover persistently around overripe fruit or drains. Fungus gnats relate to soil moisture; fruit flies relate to decaying organic matter. Control fungus gnats with soil management/Bti; control fruit flies by removing food sources and using vinegar traps away from plants.
Q: Can I use dish soap for insecticidal spray?
A: Not recommended. Most dish soaps contain degreasers, fragrances, or moisturizers that may damage plant surfaces. Pure Castile soap (like unscented varieties) contains only saponified oils and water—making it more predictable for plants. If unavailable, a commercial insecticidal soap formulated for plants is a reliable alternative.
Q: My plant has sticky leaves but I don’t see pests. What’s happening?
A: Sticky residue (honeydew) typically indicates sap-sucking activity—even if pests are hidden. Check meticulously with magnification along stem joints, leaf undersides, and where leaf meets stem. Scale insects often hide in these areas. Wipe sticky areas with an alcohol-dipped swab; if residue returns within days, pests are likely still present. Persistent honeydew can lead to sooty mold—a black fungus that blocks sunlight.
Q: Are beneficial insects safe around pets?
A: Yes. Predatory mites, ladybug larvae, and nematodes pose no threat to mammals, birds, or reptiles. They are highly host-specific, targeting only the pest insects they are introduced to control. Beneficials naturally diminish once their food source is gone. Always follow supplier instructions for release timing and conditions.
Q: How often should I inspect plants for early detection?
A: Weekly is ideal for most collections. During higher-risk periods (adding new plants, seasonal transitions), inspect every 3–4 days. Pair inspections with your regular watering routine. Keep a magnifying glass and journal nearby. Early detection when pest numbers are low allows simple mechanical removal before populations grow.
Q: Will diatomaceous earth harm earthworms or soil life?
A: Food-grade diatomaceous earth (DE) applied lightly to the soil surface primarily affects crawling insects that contact it. Earthworms typically reside deeper and avoid dry DE layers. However, excessive use may alter soil texture. Use sparingly—only a light dusting on the top inch for pest-prone plants. Reapply after heavy watering. Never use pool-grade DE.
Q: Can I save a plant with root mealybugs?
A: Often, yes, with prompt action. Remove the plant from its pot. Rinse roots thoroughly under lukewarm running water to remove soil and pests. Inspect roots closely; prune any soft or affected sections with sterilized tools. Soak remaining roots in a solution of 1 part 3% hydrogen peroxide to 3 parts water for about 10 minutes. Repot in fresh sterile mix. Isolate for several weeks and monitor closely.
Q: Why do pests keep returning to the same plant?
A: Common reasons include: 1) The plant experiences ongoing stress (light mismatch, watering issues), making it consistently vulnerable. 2) Nearby plants harbor hidden activity acting as reservoirs. 3) Environmental conditions favor the pest (e.g., dry air for spider mites). Solution: Address the plant’s overall health first, inspect all neighboring plants thoroughly, and adjust the environment (add humidifier, improve air flow).
Q: Is hydrogen peroxide safe to spray on leaves for pests?
A: Not recommended for foliage. While diluted hydrogen peroxide (1 part 3% H₂O₂ to 4 parts water) may be used in soil for certain issues, spraying leaves risks damage—causing bleaching, spotting, or tissue injury. Stick to leaf-safe methods: insecticidal soap, neem oil (tested first), or alcohol swabs for targeted treatment.
Q: How do I prevent pests when propagating cuttings in water?
A: Use distilled or filtered water changed every 2–3 days. Place cuttings away from existing plant collections. A single drop of mild liquid soap per cup of water may deter surface pests (soap breaks water tension). Once roots form (1–2 inches), transition to soil promptly—extended water propagation can stress cuttings. Inspect roots thoroughly before potting.
Q: Are ultrasonic pest repellers effective for plant pests?
A: Current research does not support their efficacy against common indoor plant pests. Studies from agricultural institutions have found no significant reduction in insect populations. Focus energy and resources on proven IPM methods: prevention, consistent monitoring, and targeted interventions. Physical barriers and environmental adjustments deliver reliable, observable results.
Conclusion: Cultivating Confidence, One Leaf at a Time
You now hold a complete, adaptable system—not just isolated tips—to navigate indoor plant pest situations with clarity and care. The Plant Guardian Framework transforms uncertainty into informed action: prevention becomes your consistent practice, observation your trusted tool, and targeted response your confident choice. Remember the three guiding pillars that sustain this approach:
1. Clarity guides action—precise identification directs every subsequent step
2. Safety informs every choice—protecting your home environment is inseparable from plant well-being
3. Adaptation deepens understanding—each experience refines your knowledge of your unique indoor ecosystem
This journey isn’t about achieving a perfectly sterile environment. It’s about cultivating resilience—in your plants, your practices, and your perspective. A single aphid on a thriving monstera isn’t failure; it’s feedback. It invites you to review humidity levels, watering habits, or simply appreciate the dynamic nature of living things on your windowsill. True confidence lies not in never encountering challenges, but in responding with knowledge rather than concern.
The 24-Hour Rule
Within the next day, take one small, concrete step that builds momentum:
– If you have plants: Spend 5 minutes checking your most vulnerable plant. Inspect soil surface, one stem joint, and the underside of one leaf with a magnifying glass. Note one observation.
– If you’re planning to buy plants: Bookmark this guide. Next time at a nursery, spend 60 seconds inspecting potential new additions under good light before purchasing.
– If you’re currently addressing pests: Isolate the affected plant. Then, use the Identification Flowchart in Step 3 to clarify what you’re observing. Clarity reduces anxiety.
This small action creates forward movement. You’ve shifted from passive concern to active, compassionate stewardship.
The Bigger Perspective
Your indoor garden is a living expression of interdependence. By choosing integrated pest management, you participate in a thoughtful approach to care—one that honors complexity rather than overrides it. The patience you practice while monitoring progress, the mindfulness you bring to weekly checks, the compassion you show when making difficult decisions—these qualities extend beyond plant care. They nurture a deeper appreciation for balance, observation, and gentle intervention in all living systems.
You are not just tending plants. You are cultivating a sanctuary where life thrives with intention. Where curiosity guides action. Where every leaf reflects care. Keep learning. Keep observing. Your plants—and your peace of mind—are worth it.
Explore Our Complete Houseplant Care System:
The Thoughtful Guide to Watering Indoor Plants | Mapping Light in Your Home for Plant Success | Understanding Potting Mixes: A Practical Guide | Propagation with Patience: A Step-by-Step Companion | Seasonal Plant Care: Adapting to Changing Light and Temperature | Decoding Leaf Changes: A Visual Guide to Plant Health | Creating a Pet-Friendly Plant Environment: Safe Choices and Placement